


Arachnophobia, claustrophobia, aerophobia… These are some of the most common phobias in the world.
But there is another major phobia that no one talks about. One that millions of founders suffer from every day. These poor souls open up Meta ads and cover their eyes. They see Advantage+ and start to shake. They hear acronyms like ROAS, CPA, and MER, and they want to scream!
I am of course talking about the worst phobia of all: Adverophobia, the fear of running ads.
In my nearly 15 years of crowdfunding, outside of making up stuff for blog post intros, I’ve witnessed my fair share of founders suffering from this phobia. And I’m proud to say that nearly all of them went from scared of ads to excited about them once they saw how the system works.
In this guide, I’ll walk you through how Kickstarter ads actually work, using the same testing, optimizing and scaling system we use at LaunchBoom to launch seven-figure campaigns. You’re about to learn the two numbers that tell you when to spend more (cost per reservation and MER) and when to pull back, how to optimize your ads systematically, and a lot more, all with real examples from Polycade Sente, iXi and SomniBuds.
Here’s a quick overview of what we’ll be covering…
Key Takeaways
- Ads build your pre-launch reservation list first, then drive sales once you’re live. On average, 30% of VIPs back the campaign, and only 1% of non-VIPs do
- Know your targets, then spend. Keep your cost per reservation under 1/3 of your VIP price, plan on about 30% of sales coming from other sources (organic, PR, referrals, etc.), and keep spending while your MER stays at 3 or higher
- Test one variable at a time before you scale. Initial testing takes about 3 weeks, one test per week, at $300-500 per test
- Judge ads by the target metric, not clicks. A 6% click-through rate doesn’t make an ad good if it costs over $6 per lead
- Once live, remarket first, then go cold, then close with urgency. Judge your spend by MER (marketing efficiency ratio = total revenue ÷ total ad spend) against your MER floor over a 7-day look back
What Is Kickstarter Advertising?
Kickstarter advertising is paid ads (mostly on Meta, so Facebook and Instagram) that send people to a pre-launch reservation funnel first, and to your live Kickstarter page later.
So how do you advertise a Kickstarter? You run ads to a landing page before launch to collect emails and $1 reservations, then you run ads straight to the campaign once it’s live.
Now, the thing most founders miss is that the goal of the ads changes as you go. We call this the target metric, and it moves with the phase:
- Initial testing: cost per lead (CPL)
- Scaling the pre-launch: cost per reservation (CPR)
- Live campaign: marketing efficiency ratio (MER)
Once you’re live, Meta ads run in 3 phases. Remarketing at launch, cold traffic from your best pre-launch audiences, and urgency at the end. We’ll walk through each one below.
Paid ads aren’t the only way to get traffic. PR, affiliates, and Kickstarter’s own discovery all help, and I cover those free channels in my guide on how to promote your Kickstarter campaign. But advertising is the best way to keep driving sales during a live campaign, because it’s the one channel you can turn up.
(Making a board game? The tactics shift a bit, so check out our guide on how to advertise your game on Kickstarter.)
10 Steps to Kickstarter Advertising That Works
Order matters here.
Funnel first, budget math second, small tests third, and you scale only after a viability check. Then you run three live phases and judge them by MER. This is the same order we use at LaunchBoom.
The one rule that runs through all of it: test before you scale. Don’t spend aggressively until you know what works, because you don’t need a heavy ad budget to learn what works and what doesn’t.
1. Build the Reservation Funnel Your Ads Point To
During the pre-launch, your whole goal is to build an email list of people who can’t wait to buy your product. To build an email list, you need a website to collect emails. And that’s where the reservation funnel comes in.
It has three parts:
- The ad, which gets the click
- The landing page, which collects an email address
- The checkout, where people put down a $1 deposit to become a VIP (a lead that puts down $1 is 30 times more likely to buy on average than a lead who doesn’t, which is why we really like the reservation funnel. That’s a different number from the 30% VIP conversion rate in step 2)
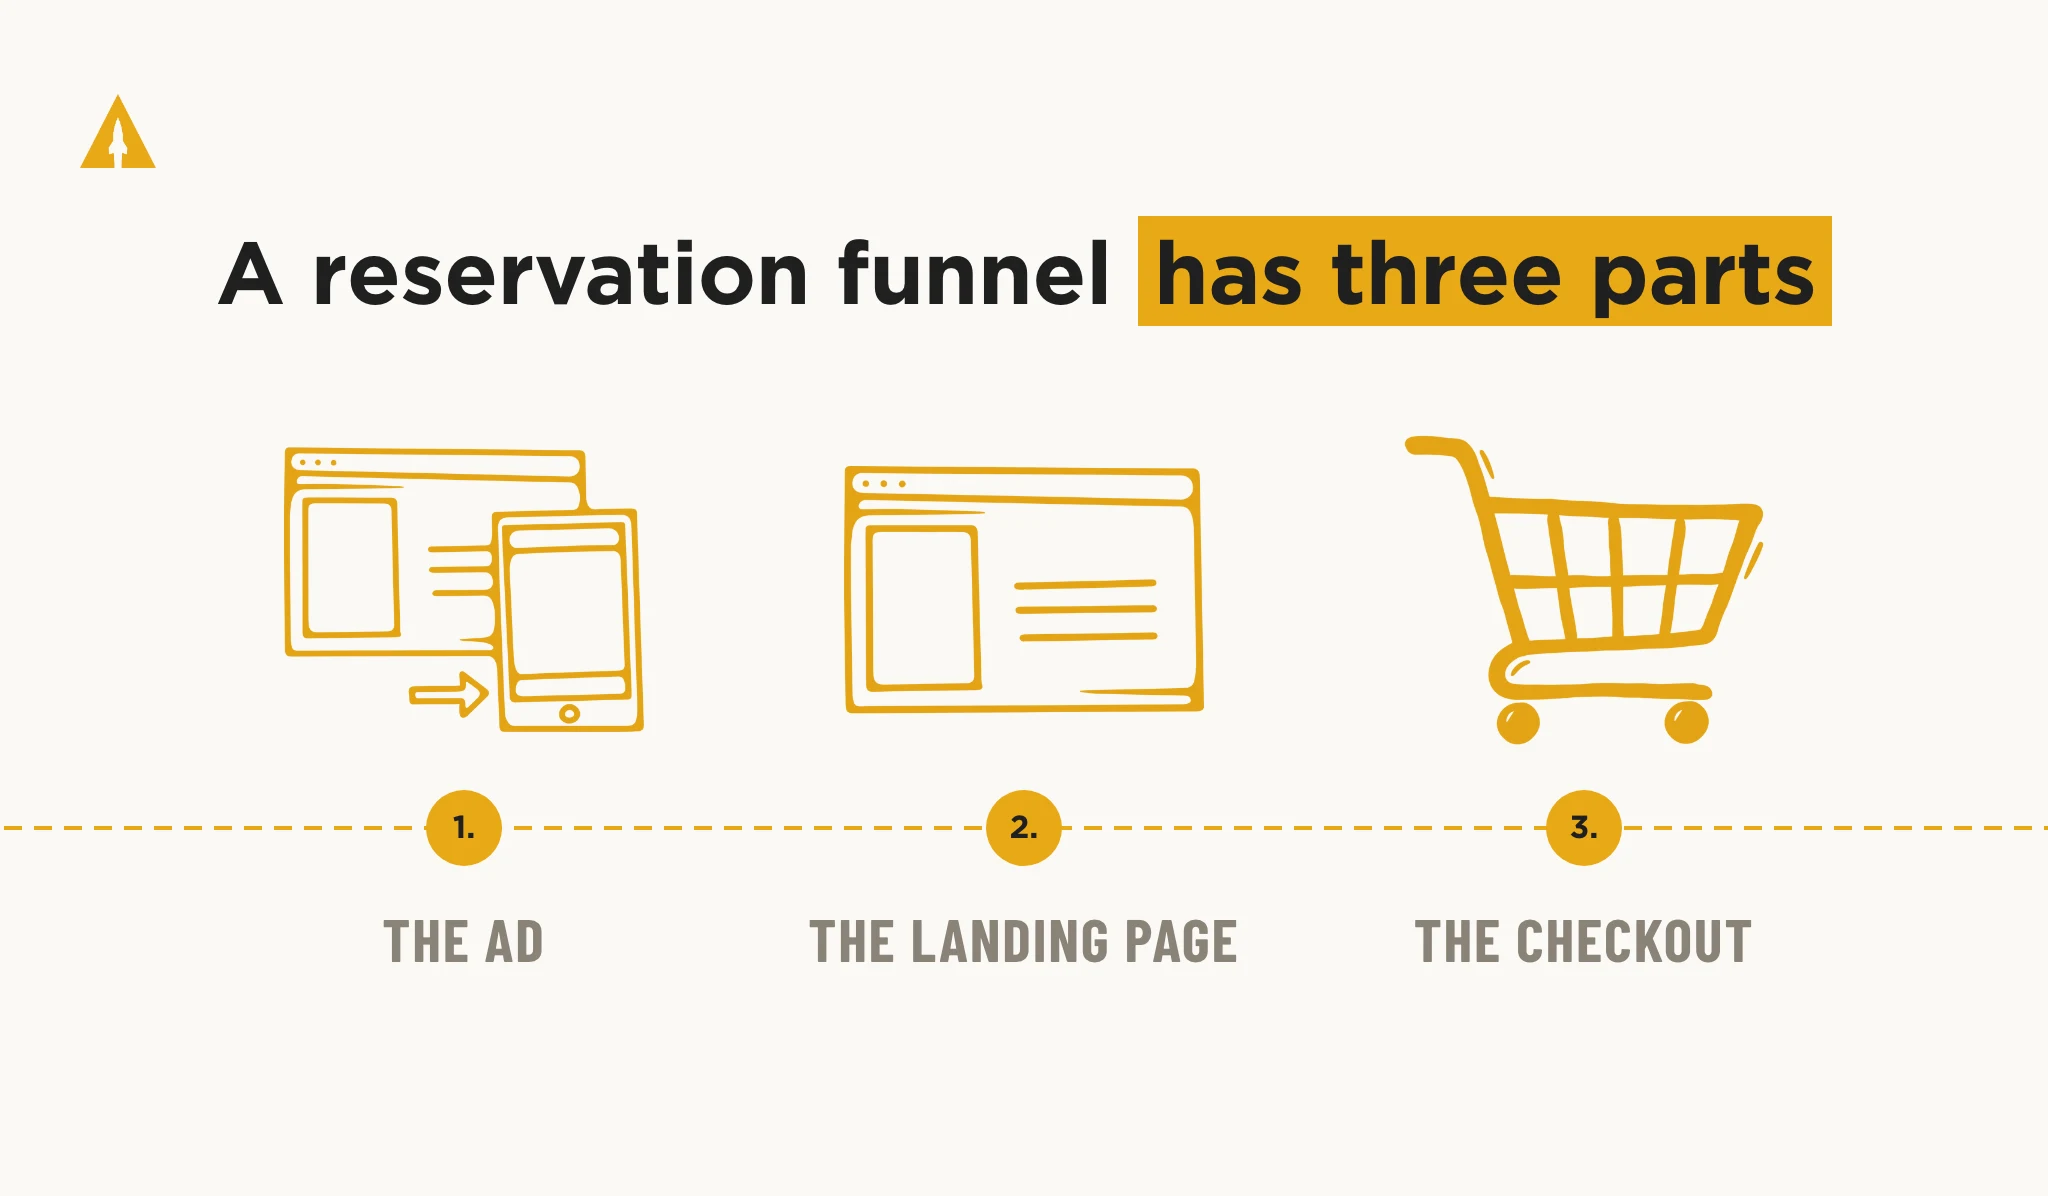
Each step has its own metric. But the number that matters most is your cost per reservation, because reservations are what predict your launch. If you want the full picture of how the funnel fits into a launch, I break it down in how to launch a successful Kickstarter campaign.
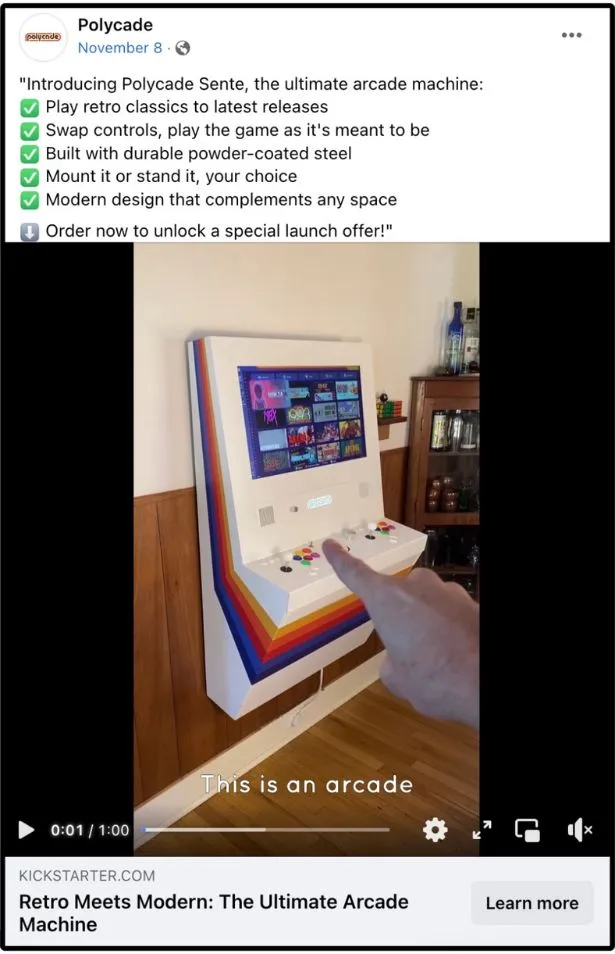
For example, we ran this exact setup for Polycade Sente, a modular arcade system and Tyler Bushnell’s second launch after the Polycade Lux. Our Meta ads drove traffic to a landing page, and visitors could put down a $1 reservation. In return, VIPs got a guaranteed 50% discount, a limited edition game with artwork by a modern artist, and an invite to the VIP Facebook group. Polycade Sente went on to bring in $1,658,958 in pre-sales on Kickstarter. You can read the full Polycade case study here.
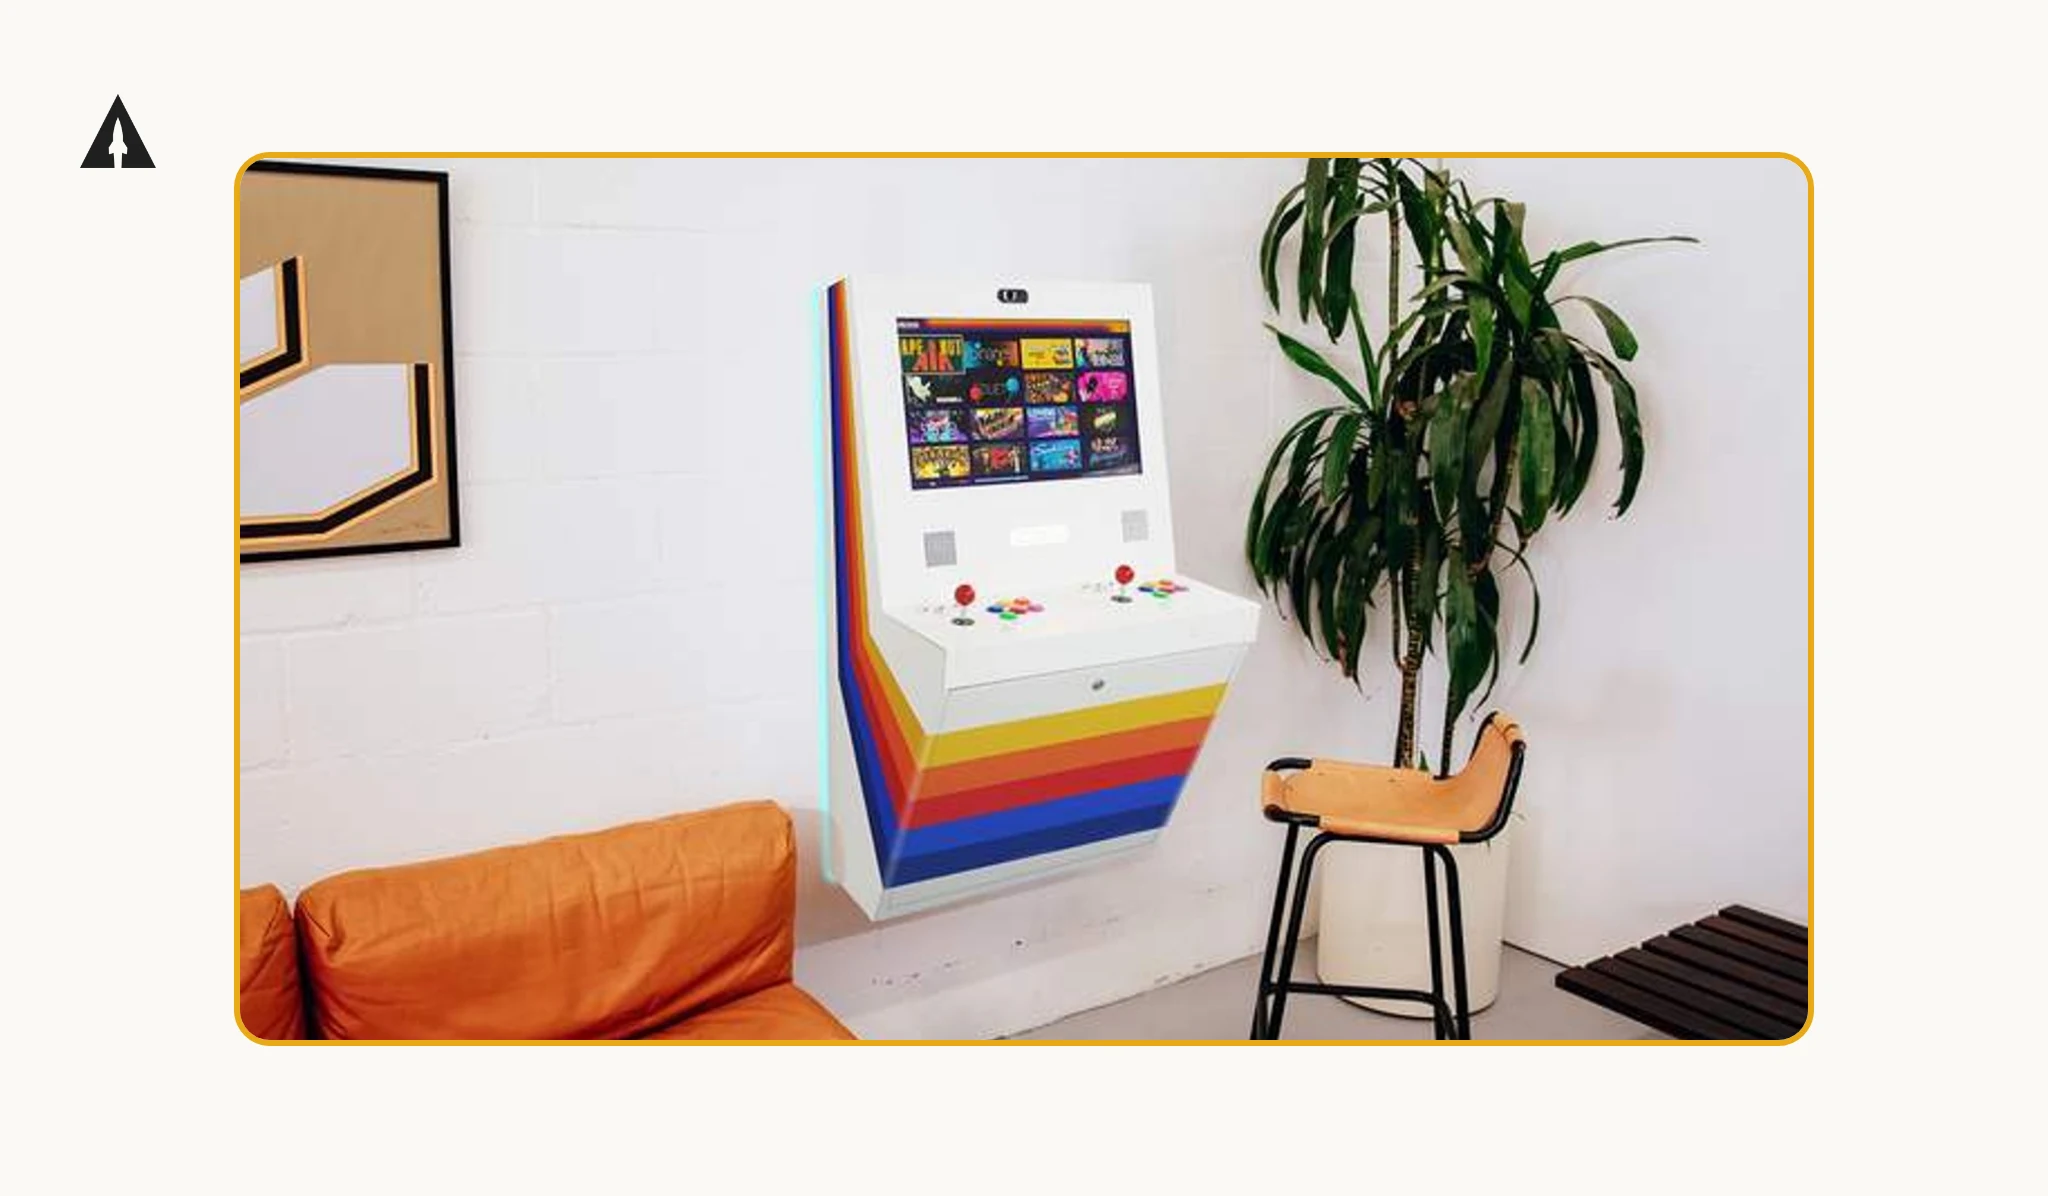
Want to see what these funnels look like? Check out these 8 pre-launch landing page examples and what makes each one work.
2. Know Your Kickstarter Ad Budget Targets Before Your Spend
Most founders pick an ad budget by gut feel. I’d recommend something different.
Your goal isn’t to spend a set amount. It’s to prove you can win customers at a profit. Once you know your numbers, you can spend more with confidence, because you know each dollar is likely to come back.
That comes down to two numbers: your cost per reservation (CPR) and your marketing efficiency ratio (MER). MER is your total revenue divided by your total ad spend. In plain terms, it’s how many dollars you bring in for every dollar you spend on ads. If you spend $10,000 on ads and raise $40,000 in total, your MER is 4.
Let’s say your VIP price is $200. Your VIP price is the best price you will offer your VIPs on Kickstarter.
1. Work out what each VIP is worth. On average, 30% of VIPs back the campaign. Conversion rates fall as your price rises (a $1,000 product converts lower than a $50 product), but 30% is the number to plan with.
- $200 x 30% = $60 per VIP
2. Find your CPR. The best way to find your CPR is to run an ad test (more on that in the next section). You’ll spend around $2,000, and that shows you what each reservation costs. For example, say that $2,000 gets you 100 VIPs.
- $2,000 ÷ 100 = $20 CPR
In most cases, we recommend your CPR not go over 1/3 of your VIP price, with a max of $100 at any price. If your VIP price is under $50, 1/3 is hard to hit, so 1/2 is a more realistic ceiling. For a $200 VIP price:
- $200 ÷ 3 = $66.67 max CPR
The example $20 CPR is well under that max, which is very good.
3. See what that CPR earns you. Start with your return on ad spend (ROAS). That’s the money your ads bring in directly, divided by what you spent on them. In our example, each VIP costs $20 and is worth $60.
- $60 ÷ $20 = a ROAS of 3
That alone is solid. And it gets better, because ads aren’t the only place sales come from. The crowdfunding platform, PR and referrals usually bring in about 30% of sales, which means ads bring in the other 70%. So for every $70 your ads bring in, you get about $30 more from other places. That’s a lift of about 1.43x.
- $60 x 1.43 = about $86 per VIP
- $86 ÷ $20 = an MER of 4.3
That 4.3 is your expected MER. It’s higher than your ROAS because it counts every sale, not just the ones your ads bring in directly.
A good rule of thumb: an MER of 3 or higher usually means you’re profitable. (To find your own number, start with your margin. If your $200 product costs $80 to make, ship and cover fees, and you want to keep 25% as profit, ads can take up 35% of revenue. 1 ÷ 35% = an MER of about 2.9.)
4. Use it to plan your pre-launch spend. Say you spend $20,000 on ads and your CPR holds at $20.
- $20,000 ÷ $20 = 1,000 VIPs
- 1,000 x 30% = 300 backers
- 300 x $200 = $60,000 from VIPs
- $60,000 x 1.43 = about $86,000 on day one, counting sales from other sources
5. Do the same for your live campaign. Once you’re live, watch your MER. If you’re getting about $4 back for every $1 you put in, every $10,000 you spend should bring in about $40,000. As long as your MER stays above your target, keep spending as much as you can.
Now you have a model you can work with. These numbers will change as you go. Your CPR might rise or fall in pre-launch, and your MER will move during the campaign. When they do, adjust your spend to match. Under your CPR target or over your MER target: spend more. Missing them: fix your ads or your offer before you spend more.
To be really clear, this plan only counts reservation revenue. Some non-VIPs will buy too (about 1% of them), but they’re too hard to predict, so treat them as a bonus.
The math also tells you when to launch. iXi, a self-driving golf trolley, set its launch by reservation count, not a date. “Everyone had a different opinion. One month, six months. The answer was no,” says Laetitia Freysen. “We need this many VIP reservations first.” (iXi launched on Indiegogo with a $50 deposit, so the 30% rate above doesn’t describe iXi. The idea does.)
3. Run Your First Ad Tests One Variable at a Time
Now you can start spending.
But slowly. Your first round of testing should take about 3 weeks, with one test per week:
- Images
- Headlines
- Primary text
Each test changes one thing only. That way, when one ad beats the others, you know it’s because of the one thing that’s different. For the headline test, you use your winning image and the same primary text. For the primary text test, you use your winning image and winning headline.
Spend $300-500 per test, for around $1,000-5,000 total. Anything under $300 per test probably won’t tell you much. Anything over $500 probably won’t teach you anything more. Around $2,000 is a good rule of thumb.
Your first target is a $3 CPL. It’s very likely you’ll start above that, and that’s okay. Initial testing is about working toward it.
Clarity beats cleverness here.
Keith Phillips nearly launched SomniBuds, his battery-free sleep earbuds, with no pre-launch at all. He stopped, and we built a reservation funnel instead, and the launch brought in $246,698 in pre-sales on Kickstarter. Along the way, we ran a curiosity ad (“These are not Bluetooth earbuds, but they’ll stream audio all night long”) that did great, then suddenly crashed. The ad never said they were sleep earbuds, and the comments filled up with confused people. We redid it with “sleep” up front, and it picked up again. You can read more in the SomniBuds sleep earbuds case study.
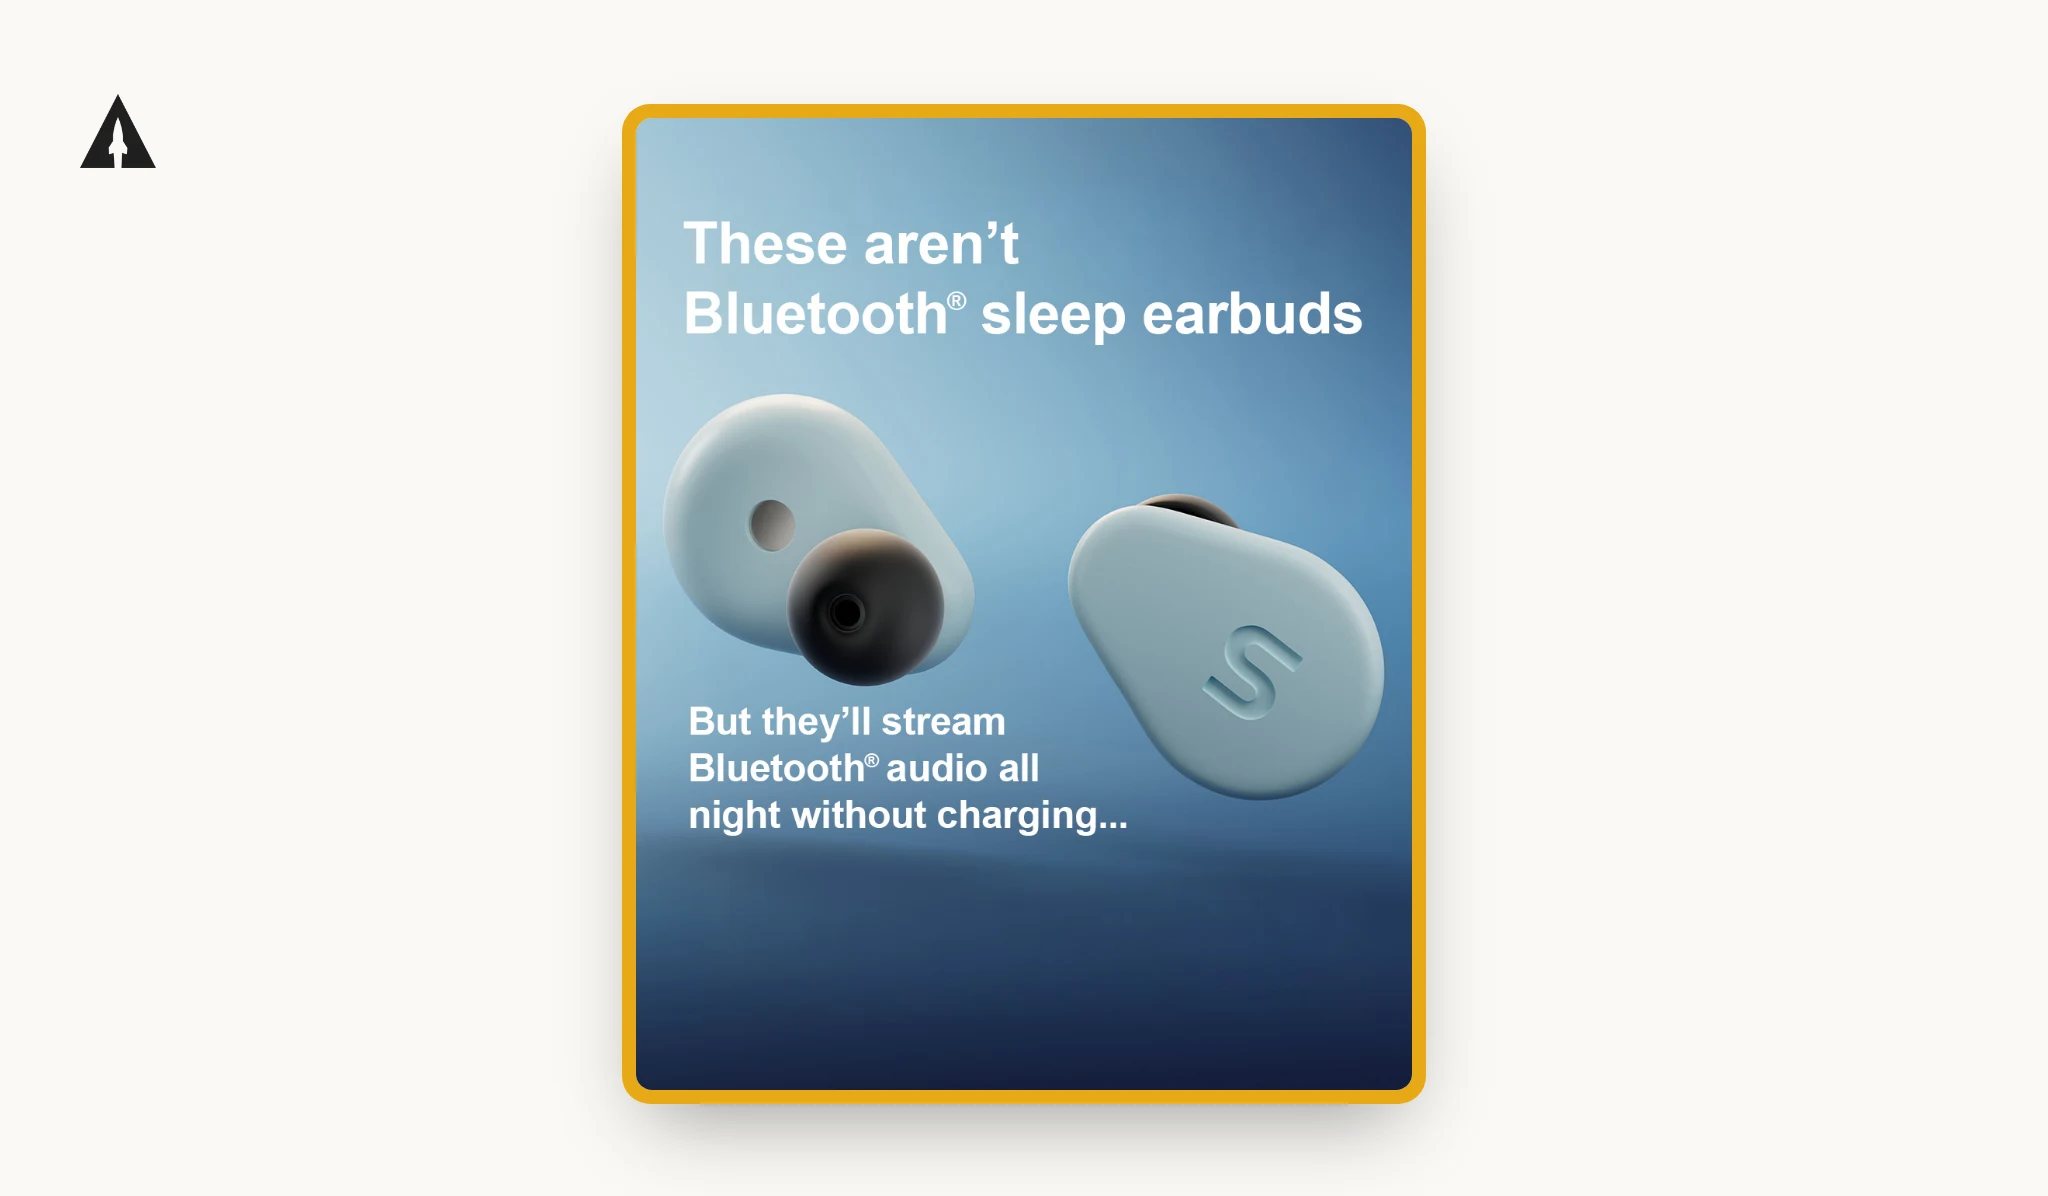
On the other side, iXi’s product renders and motion design videos performed consistently well across the ad campaigns we ran. Here was our best performing ad:
Great imagery of a great product helps a lot.
4. Optimize with a Kill Phase and a Budget Phase
Every metric in your ad account is either a target metric or a leading metric.
The target metric is the goal (CPL right now). Leading metrics happen earlier in the funnel and lead to the target metric. For example, cost per 1,000 impressions (CPM), click-through rate (CTR), landing page conversion rate and so on.
Now while leading metrics can point you toward things to fix in your funnel, they never decide whether an ad is good or not on their own. Only the target metric does.
For example, your leading metric for landing page conversion rate may be below the 15% baseline benchmark. That means you should A/B variations of your landing page. It doesn’t necessarily mean your ad isn’t working.
Here are the benchmarks for lead optimization:
| Metric | Benchmark |
|---|---|
| CPL (target metric) | $3 |
| CPM | Under $15 |
| CTR | 3% or higher |
| Landing page conversion rate | 15-20% or higher |
| Lead-to-reservation conversion rate | 2.5% or higher |
When it comes to ad optimization, we break it down into two phases:
- The kill phase. Look at each ad. If it’s at or near a $3 CPL, leave it on. If it’s far off and getting a lot of spend, turn it off. If it has little to no spend, leave it on, because it hasn’t had a chance yet. Facebook usually piles most of the spend onto 1 or 2 ads, so killing the bad ones forces it to try others.
- The budget phase. Look at each ad set. Raise the budget on strong ad sets by 20%, leave average ones alone, and drop weak ones by 20%. Anything bigger than 20% forces Facebook to relearn, and your performance suffers while it does.
Do both phases about every other day, looking at the last 7 days of data. Changing things every day hurts Facebook’s ability to learn too.
This takes patience. For Polycade, we tested many different variations of copy and imagery before landing on the best performing ad.
5. Pick Winners and Check Viability Before You Scale
Once you’ve spent around $300 on a test, look for a winner.
You have a clear winner if nothing is within 50 cents of its CPL across ad sets, or if one ad has all the reservations. If there’s no clear winner, keep killing the worst ads and decide at around $500. Still tied? Pick the ad with the best CTR and move on. Numbers that close usually mean there are more important things to test.
After all three tests, you’ll have your best combination of image, headline and text. Now comes the most important checkpoint in the whole pre-launch: is this good enough to put real money behind?
Purchase intent comes first. You can move on if your CPR is within 50% of your CPR target from step 2. So if your target is $50, you’d want $75 at most. Your leading metrics should also clear these floors:
- CPL under $5
- CTR over 1.5%
- Landing page conversion rate over 15%
If your CPR is off but your CPL is under $5, scaling with purchase optimization is still viable. Keep a close eye on it. If not, stay in lead optimization and keep testing.
When you’re still off, this table tells you where to look:
| CTR | Landing page | What it means |
|---|---|---|
| Over 1.5% | Over 15% | The funnel works. CPM is likely the problem, so try new audience strategies |
| Under 1.5% | Over 15% | The page works, but the ads don’t get clicks. Test new visuals and tighter copy |
| Over 1.5% | Under 15% | The page isn’t pulling its weight. Test new page content or a new order |
| Under 1.5% | Under 15% | It’s the core positioning, not the ads. Time for a messaging overhaul |
6. Scale Reservations with Purchase Optimization
Once you pass the viability check, it’s time to scale.
That means switching your campaigns from optimizing for leads to optimizing for purchases (which, in your funnel, are reservations). Your target metric is now cost per reservation. Your CPL stops mattering, and it’ll often jump way up. That’s fine as long as your CPR keeps improving.
Your leading benchmarks change too:
| Metric | Purchase optimization benchmark |
|---|---|
| CPM | $25 or lower |
| CTR | At least 2% |
| Landing page conversion rate | 20% |
| Lead-to-purchase conversion rate | 4% |
Why do most of these get worse? Because when you tell Facebook you want purchases, it shows your ads to people who buy things more often. Those people are deliberate. They click less, but when they click, they’re more likely to buy. That jump in purchase intent should give you a lower, steadier CPR as you scale.
Serious buyers don’t mind paying more to reserve, either. For iXi, we raised the reservation from $1 to $50, and the conversion rate on the Meta ads didn’t drop. For a high-priced product, a bigger deposit can give you better buyers and better data without hurting your ads.
One more example. For our client, SomniBuds, we found that acquiring leads in the UK was much cheaper than in the US, especially from people over 50. But those leads rarely reserved, meaning they weren’t actually that qualified. On the flip side, younger US audiences had a higher CPL but a lower CPR than the UK, which is why most of the spend went to those audiences.
7. Remarket to Your List the Moment You Launch
Launch day is where the pre-launch pays off.
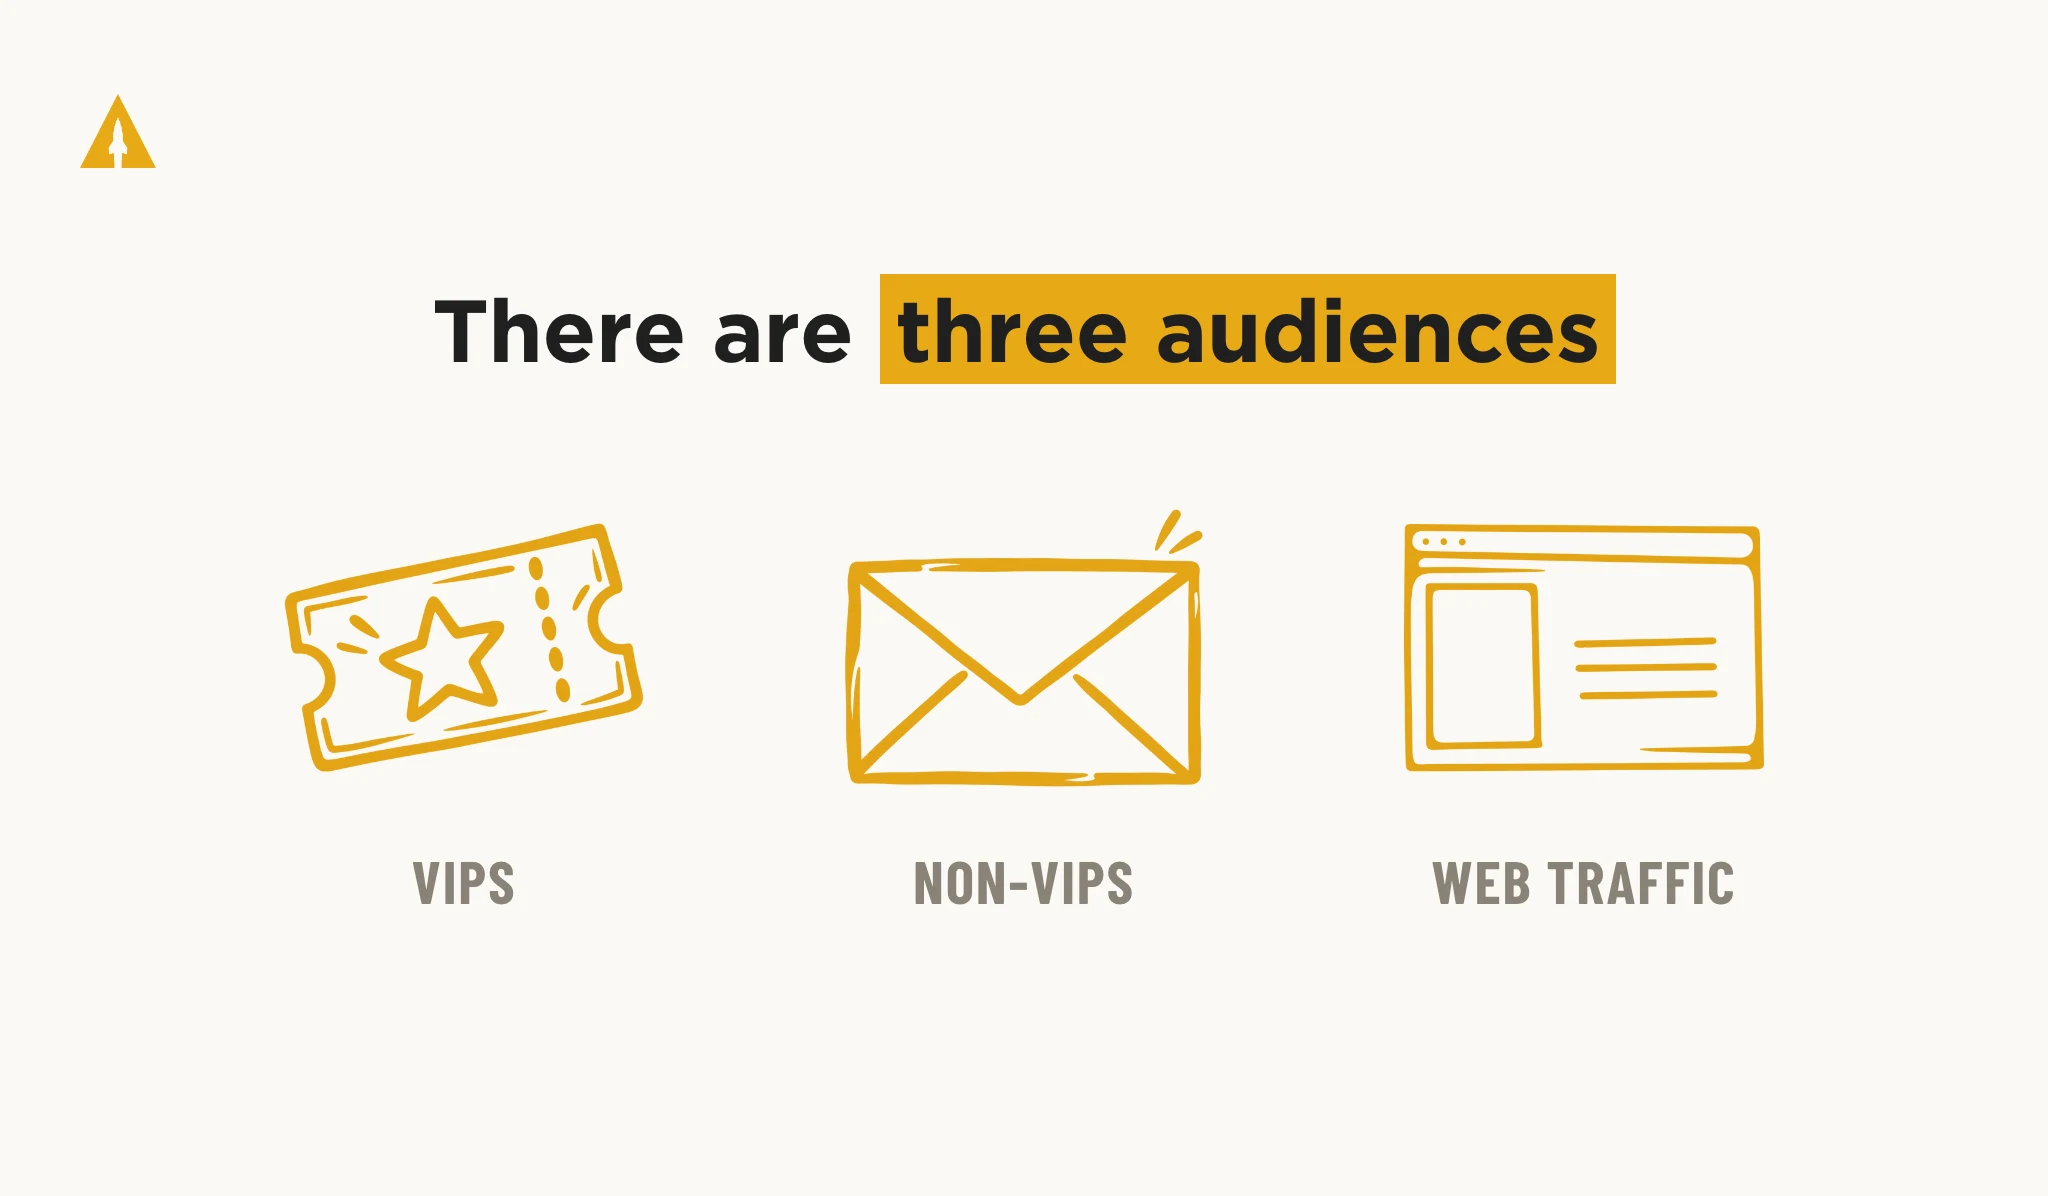
Live phase 1 is remarketing, which means showing ads to people who already know you. There are three audiences:
- VIPs: everyone who joined your list and put down a deposit
- Non-VIPs: everyone who joined your list and didn’t
- Web traffic: everyone who visited your page but didn’t sign up
These people are far more qualified than cold audiences, so they bring a very high return on ad spend. They also create what I call the “surround-sound effect.” From their inbox to their social feed, they see your product everywhere.
Turn these ads on 2-3 hours after launch. Give your email list time to build some traction first. More funding means more credibility, and that makes ad visitors more likely to buy.
There’s no set budget here. Run remarketing while it’s profitable and stop when it falls off, which typically happens 2-3 days after launch. These audiences are small. Then you turn it back on for the last 3 days (step 9).
For contrast, we didn’t run live ads for iXi at all. The team launched on Indiegogo mainly to prove the market to investors, and all of its $731,185 in pre-sales traced back to the pre-launch funnel, for an MER of 14. That’s rare, and it shows what a strong pre-launch can do on its own. Here’s the full story of the million-dollar golf trolley.
8. Expand to Cold Audiences with What Already Worked
Live phase 2 is cold traffic.
This is where a lot of founders start over. Don’t. One of the main benefits of a pre-launch is that you’ve already tested your positioning, creative and audiences. Start with your best performers, and only pivot if they stop working. Don’t fix what isn’t broken.
The one change is the call to action. Instead of “sign up,” it’s “back it now at a discount.”
You’ll also have new assets to work with:
- Your campaign video, cut into short clips (people have short attention spans, so the full video rarely works as an ad)
- Product walkthrough videos, which show how the product works
- Testimonial videos, which give buyers a reason to trust you
For audiences, start here:
- Lookalikes of your leads and VIPs, updated with your full lists
- Your best performing interest audiences from the pre-launch
- Other countries driving strong revenue (your Kickstarter dashboard shows which ones), if you can ship there
For copy, three themes work best. Announce that the campaign is live at a discount. Use your campaign’s success as social proof. And share any PR quotes or testimonials you have, because crowdfunding products don’t have reviews the way Amazon products do.
9. Close Strong with Urgency Ads
Live phase 3 is the finish line.
The first and final weeks of a campaign convert best, because backers feel the pressure of limited-time deals. The final week is second only to the first.
So in the last days, switch both your cold and remarketing copy to urgency. Something like “last chance to get the discount before the campaign ends.” Then turn remarketing back on for the last 3 days and run it while it stays profitable.
10. Use MER and Referral Links to Decide When to Scale or Stop
Now, how do you know if your live ads are working?
You’ll see three numbers:
- ROAS = tracked revenue ÷ ad spend
- CPA = ad spend ÷ backers
- MER = total revenue ÷ total ad spend
MER is the most important one. Here’s why.
Tracking on Kickstarter isn’t perfect. I’d expect Kickstarter itself to miss at least half of the conversions. Someone sees your ad, then googles the campaign later. Or they click, leave, and come back a day later. Those sales came from your ads, but tracked ROAS won’t show it. If your MER is above your floor, keep spending, even when tracked ROAS looks weak.
To decide when to stop, set an MER floor. That’s the lowest MER where you still make the profit you need:
- MER floor = 1 ÷ the share of revenue you can spend on ads
That share comes from your margin. In the example from step 2, ads could take up 35% of revenue:
- 1 ÷ 35% = about 2.9 MER floor
My take: there are no hard rules on when to cut ads, because everyone has different goals. But if your ads sit below your MER floor after a 7-day look back period, I’d likely cut them.
Get your tracking right before you launch, too. Kickstarter has its own setup that connects your project to Meta through the Meta Pixel and the Meta Conversions API, and its help center walks you through it. Then make a unique Kickstarter referral link for each ad, and compare the sales on each link against what Facebook reports.
Why Choose LaunchBoom for Kickstarter Advertising?
Kickstarter advertising is one piece of a launch. We help with all of it.
At LaunchBoom, we’ve helped 1,000+ founders bring in $200M+ in presales. Here’s what that looks like for your ads:
- Product positioning: we find the angle that makes your product stand out in a crowded market
- Your superfan: we pinpoint the people who want to buy your product the most, so every dollar goes after the right audience
- Your reservation funnel: we design and build your full funnel with LaunchKit, our own software
- Email marketing: we build every automation and campaign that goes out during your pre-launch and your live campaign
- Ad creative: we make your ad images, write your ad copy and set up your audience targeting
- Running your ads: we test, optimize and scale them, from the first ad test through all three live phases
- The rest of the crowdfunding system: we handle every other piece of the launch, so all of the marketing works together toward one goal: a highly successful campaign
Final Thoughts
By now your Adverophobia should feel like a distant memory. Because now you understand every step that goes into a comprehensive and successful Kickstarter advertising strategy.
You know how to set clear CPR and MER targets. You see the value of disciplined testing and optimization. You know when to turn things off and when to scale up.
Polycade Sente showed that reservations predict day one. iXi showed that serious buyers will pay a bigger deposit. And SomniBuds showed that small, clear changes and steady scaling beat rushing. Start early, test one thing at a time, and let the numbers tell you when to push.
If you want help building your ad plan, book a call with my team. We’ll walk through your goal, your numbers and how we can help you succeed.
Kickstarter advertising: Frequently Asked Questions
How do I advertise a Kickstarter?
Run Meta ads to a pre-launch landing page that collects emails and $1 reservations, then run ads to the live campaign once it launches. Test one variable at a time before you scale, and remarket to your list right after launch.
The order goes: build your funnel, set your targets, test, optimize, check that the numbers work, scale, then run ads through the launch, the middle and the final days of your campaign.
How much should I spend on Kickstarter ads?
Start with your targets instead of picking a number. Spend around $1,000-5,000 on an ad test (about $2,000 is typical) to find your cost per reservation (CPR), and keep it under 1/3 of your VIP price. Then keep spending as long as your MER (total revenue ÷ total ad spend) stays at 3 or higher.
For example, with a $200 VIP price, a $20 CPR and about 30% of reservations turning into backers, each reservation is worth about $60. Add sales from other sources and your MER lands around 4.3, so every $10,000 in ads should bring in about $43,000.
How much does a Kickstarter campaign cost?
Beyond making the product, the big costs are ads and fees. Kickstarter collects a 5% fee from funded projects, and its payment processor, Stripe, collects a processing fee of roughly 3-5%.
Neither fee applies if the project doesn’t fund. Your ad budget is usually the biggest marketing cost. Plan it around a cost per reservation under 1/3 of your VIP price, and keep spending while your MER stays at 3 or higher.
Do Facebook ads work for Kickstarter?
Yes. Facebook and Instagram ads are how most founders build a pre-launch reservation list, and advertising is the best way to keep driving sales during a live campaign.
They work best when you treat them as a system: test, optimize, check viability, then scale.
How do you track sales from Kickstarter ads?
Connect your project to Meta through Kickstarter’s Meta Pixel and Conversions API setup before you launch, and make a unique Kickstarter referral link for each ad. Then judge your ads by MER (total revenue ÷ total ad spend), not just tracked ROAS.
Tracking will miss a lot of sales, because people often see an ad and come back later on their own.
Should I hire a Kickstarter advertising agency or run ads yourself?
If you have the time to learn Meta ads and follow the benchmarks, you can run them yourself. If you’d rather not spend your budget learning, an agency can save you wasted spend.
Either way, the system is the same: build a reservation funnel, set your cost per reservation and MER targets, test one thing at a time, and cut live ads once they stop paying for themselves.
Is Kickstarter still worth it?
Yes. Kickstarter is still where backers already have accounts and are used to buying new products, and it’s built tools like the Meta Pixel and Conversions API to support founders who advertise.
What’s changed is the bar. Founders who build a list before launch and run disciplined ads are the ones who fund on day one.
