Designing a board game is an exciting creative journey that blends art, strategy, and business. You’re not just inventing a fun pastime, you’re crafting a world for players to explore, challenges to overcome, and a product to bring to life in the real world.
But beyond the initial idea lies a complex process of refining gameplay, building community, managing production, and launching successfully on platforms like Kickstarter.
Whether this is your first design or your next project, this guide walks you through every crucial step, from concept to crowdfunding and beyond.
If visuals are more your thing, you can also watch the video version of this comprehensive breakdown on how to bring your game to life here:
Contents
- Key Takeaways
- Step 1: Start With a Strong Concept
- Step 2: Define the Mechanics That Bring It to Life
- Step 3: Build a Prototype (and Break It)
- Step 4: Playtest, Iterate, and Balance
- Step 5: Finalize Your Design and Visual Identity
- Step 6: Handle Business and Legal Foundations
- Step 7: Build Your Community and Marketing Engine
- Step 8: Choose the Right Crowdfunding Platform
- Step 9: Prepare for Production and Manufacturing
- Step 10: Deliver and Fulfill Smoothly
- Step 11: Run a Post-Mortem and Plan What’s Next
- You’ve Got the Blueprint, Now Build It
- Frequently Asked Questions
Key Takeaways
- Successfully launching a board game requires integrating creative design, operational planning, and marketing strategy rather than focusing on just one aspect.
- The strongest games combine theme, mechanics, and player experience, use iterative prototyping and playtesting, and leverage professional visuals to increase engagement and perceived value.
- Game creators should treat their project like a business, investing in legal protection, budgeting, and workflow planning early to reduce risk and streamline production.
- Kickstarter, BackerKit, and Gamefound have different strengths, showing that success depends more on community readiness and preparation than the platform itself.
- Even well-designed games can fail if prototypes are not tested, backers are not engaged, or fulfillment and logistics are mismanaged; market fit and execution matter as much as creativity.
Step 1: Start With a Strong Concept
Every successful board game begins with a compelling core idea, a hook that grabs players and guides every design decision. This often comes from a blend of an engaging theme and unique mechanics that work together naturally.
For example…
PARKS captures the experience of exploring National Parks by combining trail movement, seasonal progression, and resource collection in a way that mirrors a real hike. Each mechanic, like shifting weather, shared paths, and wildlife, directly supports the theme and makes the gameplay feel purposeful and immersive.
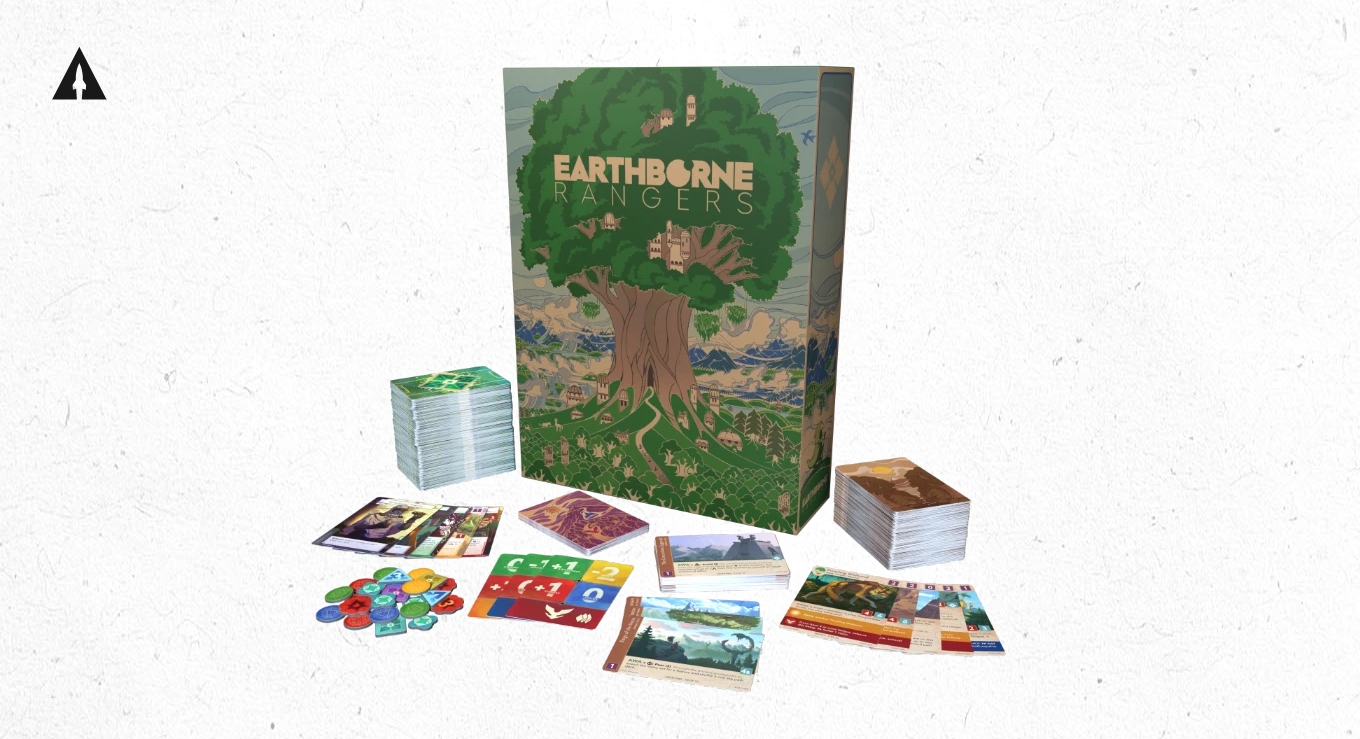
Earthborne Rangers has tactical combat mechanics that reflect the game’s story of elite rangers battling aliens, with character progression and mission objectives tightly integrated into gameplay.
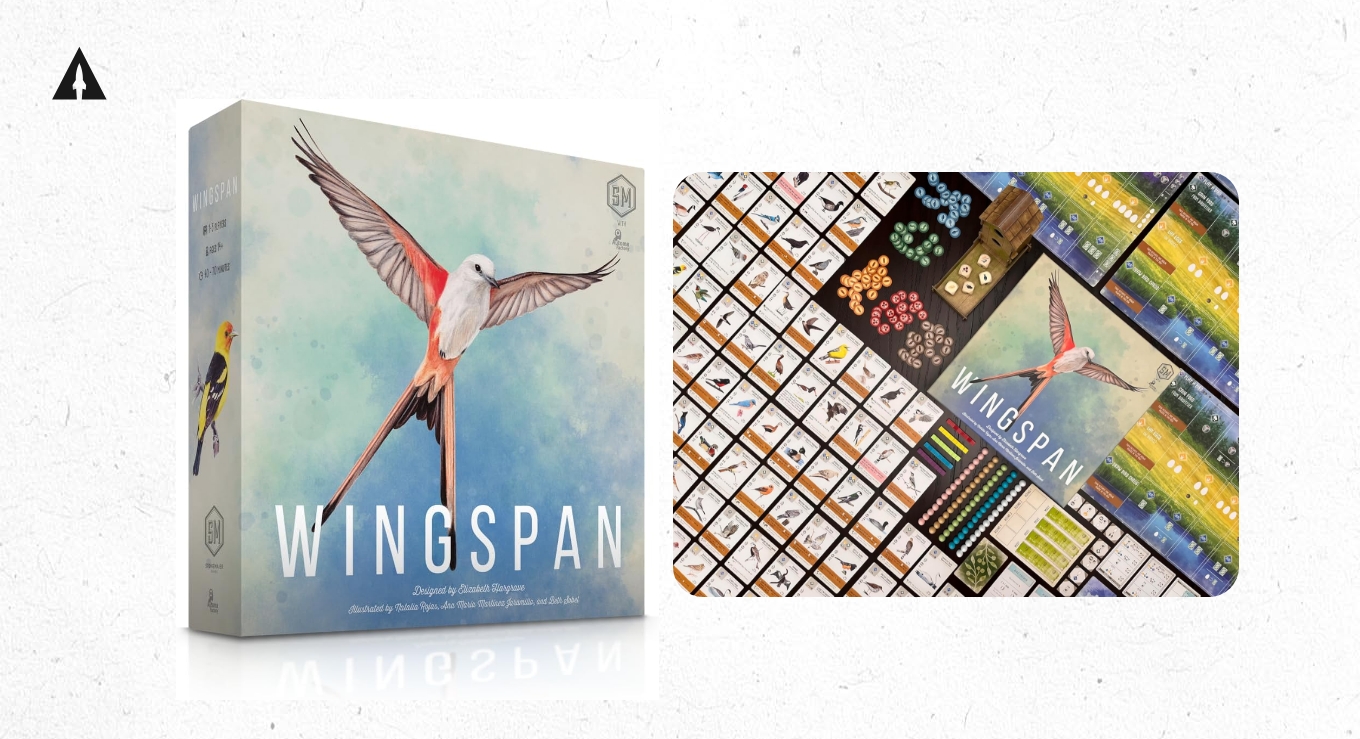
Wingspan is a tableau-building game where players attract real bird species to their wildlife preserve, learning about avian biology through card play and habitat management.
Tips for Creating Your Game Concept:
- Integrate theme and mechanics deeply. Avoid mechanics that feel tacked on; your gameplay should reinforce the story or setting you want to evoke.
- Know your audience early. Whether designing for families, casual gamers, or strategy enthusiasts will shape your complexity and style.
- Focus on clarity and uniqueness. Aim for an idea that’s easy to grasp but offers layers of strategic depth or narrative richness.
- Research existing games. Identify gaps or opportunities in the market to position your game uniquely.
- Test your core concept quickly. Even a simple prototype or paper sketch can reveal whether your idea has potential to engage players.
Step 2: Define the Mechanics That Bring It to Life
Mechanics are the fundamental rules and systems that create player decisions, conflicts, cooperation, pacing, and ultimately, the feel of your game. They are the backbone on which your theme is built.
Why Mechanics Matter
- Player engagement depends on meaningful choices. Mechanics should present players with interesting decisions, trade-offs, and strategic depth.
- They drive pacing and tension. Well-designed mechanics control how quickly the game unfolds and build excitement or suspense.
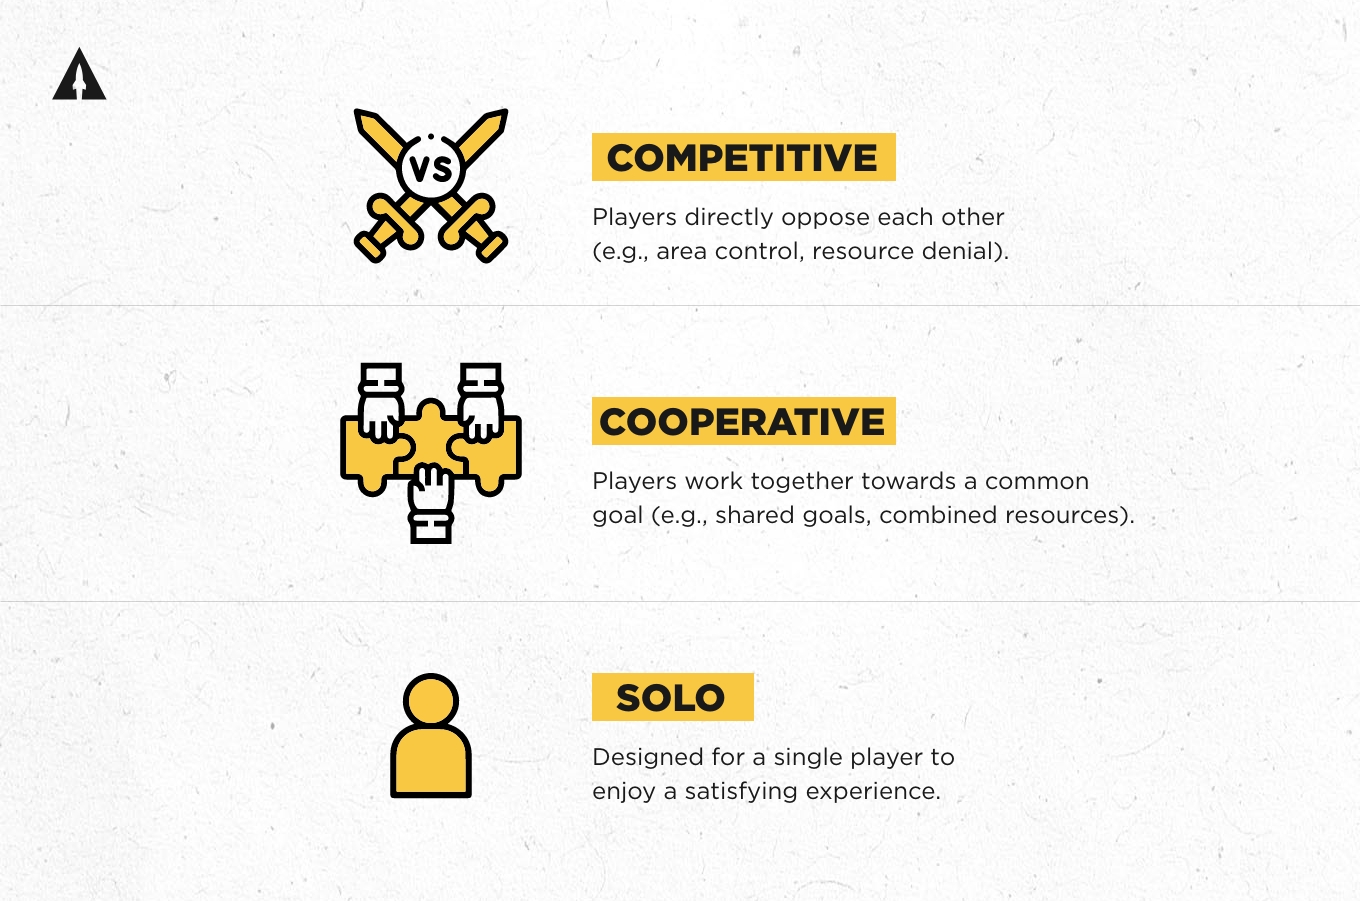
- Interaction and replayability. Mechanics influence how players interact whether competitively, cooperatively, or solo and how much variety the game offers over multiple plays.
Identify the core player experience you want to create.
Are you aiming for fast-paced excitement, deep strategy, casual fun, or storytelling immersion? Your mechanics should support this.
Start simple and build complexity gradually. Begin with a few core mechanics that work well together, then layer in new elements to deepen gameplay without confusing players.
For example…
Deep Madness uses cooperative exploration and tense combat mechanics to create suspense and teamwork. The way players share information and manage resources keeps tension high.
Azul uses simple yet elegant tile-drafting offers players tough choices in selecting patterns while competing for limited resources, creating emergent strategy from minimal rules.
Flamecraft combines engine-building and worker placement mechanics to reward combo-building and strategic planning. Each mechanic supports the other, offering satisfying depth without overwhelming complexity.
Tips for Approaching Mechanics in Your Design
Consider player interaction types:
- Competitive: Players directly oppose each other (e.g., area control, resource denial).
- Cooperative: Players work together towards a common goal (e.g., shared goals, combined resources).
- Solo: Designed for a single player to enjoy a satisfying experience.
Keep in mind:
- Pacing and flow: Design mechanics that control the game’s rhythm,how long turns take, when critical moments occur, and how tension rises and falls.
- Meaningful decision-making: Mechanics should force players to make trade-offs and prioritize strategies, avoiding “runaway leaders” or choices with obvious best moves every time.
- Scalability: Ensure your mechanics work smoothly with different numbers of players, maintaining balance and engagement.
- Replayability: Introduce variability through random elements, modular boards, multiple strategies, or evolving player powers to keep the game fresh.
- Accessibility: Craft rules and mechanics that can be learned quickly but mastered over time to appeal to both new and veteran players.
Remember to test and iterate aggressively. Playtesting reveals which mechanics deliver fun and which feel clunky or confusing. Be ready to scrap or tweak mechanics based on feedback.
It’s also important to avoid “gimmicks” that don’t serve gameplay. Mechanics should have a clear purpose; flashy or complicated rules that don’t add meaningful choices will frustrate players.
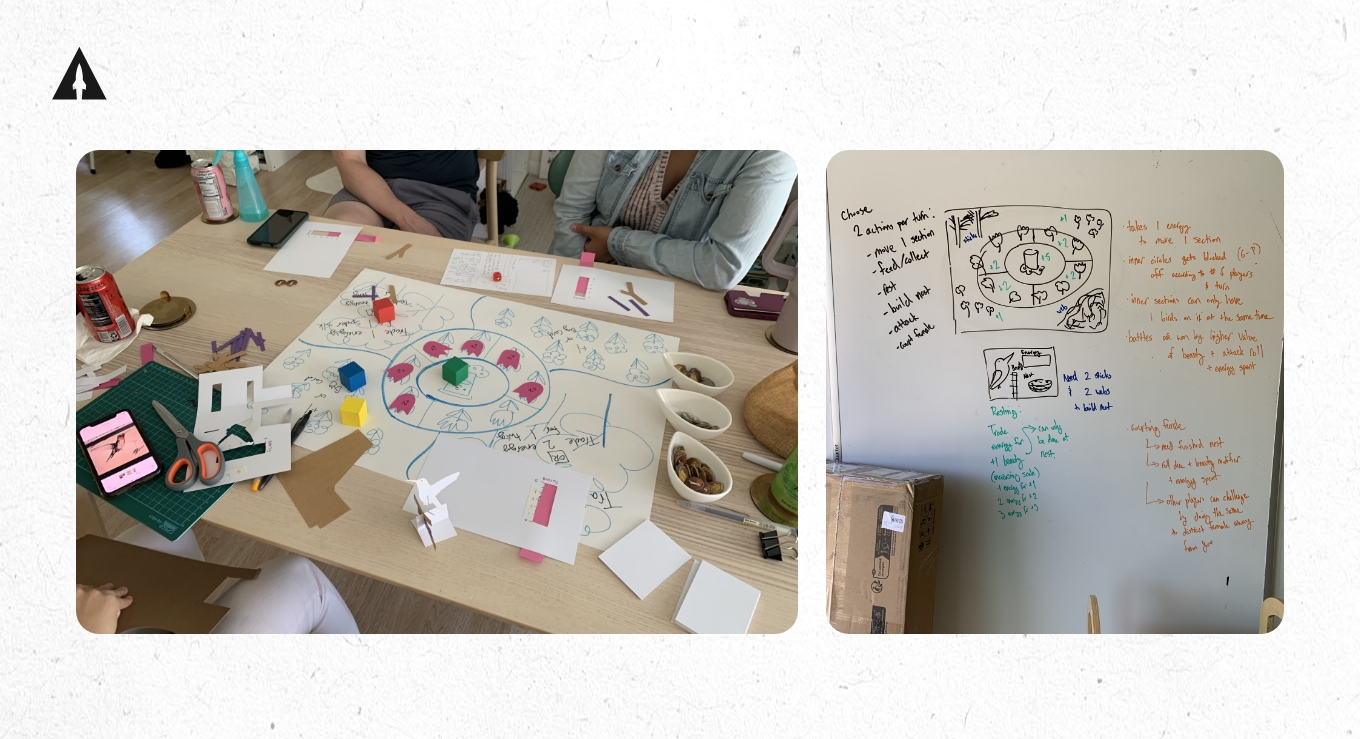
Step 3: Build a Prototype (and Break It)
Creating a prototype is where your game begins to take physical form, allowing you and others to interact with your design in a tangible way. This early version does not need to look beautiful or be production-quality, it just needs to be playable enough to expose flaws, test mechanics, and gather feedback.
Prototyping is essential because it shifts your ideas from theory into practice. It forces you to confront practical issues, such as rule clarity, pacing, and player engagement, long before any investment is made in manufacturing or art.
When to Stay DIY vs. When to Move to a Manufacturer
In the earliest stages, a DIY prototype built from simple materials like paper, index cards, tokens, or even handwritten components is the best choice. This approach is affordable, flexible, and lets you iterate quickly. It’s easy to change rules, swap parts, or scrap entire mechanics without costly delays.
As your design stabilizes, when core mechanics and flow feel solid and you’re confident in your component needs, it’s time to consider moving to a manufacturer for a high-quality prototype. This step is crucial for:
- Testing the feel and durability of components like cards, tokens, miniatures, or boards.
- Assessing the aesthetic impact of artwork, color schemes, and graphic design.
- Verifying production feasibility and understanding manufacturing constraints.
- Using the prototype for professional playtesting, marketing, and funding campaigns.
Waiting too long to create a manufacturer-quality prototype risks delays in launch schedules and surprises during production. But moving too early may lock you into expensive components for a game that still needs major changes.
Tips for Prototyping
- Use inexpensive materials like index cards, dice, coins, and stickers to keep the process affordable and flexible.
- Focus first on core gameplay loops and mechanics rather than artwork or component quality.
- Prototype incrementally: test individual mechanics before combining them to identify potential conflicts or redundancies.
- Playtest with a wide range of players, including friends, family, and experienced gamers, to gather diverse feedback.
- Don’t hesitate to “break” your prototype, seek out what frustrates or confuses players as these insights are invaluable for improvement.
- Keep detailed notes on feedback and changes to track progress and avoid repeating past mistakes.
- Prepare clear goals for each playtest session, whether testing rule clarity, pacing, or balance.
- Encourage honest, critical feedback and observe playtesters’ reactions closely without interrupting.
- Vary player counts during testing to ensure balance and fun at different player numbers.
Step 4: Playtest, Iterate, and Balance
Once your prototype is playable, it’s time to stress-test your game through structured, consistent playtesting. Prototyping and playtesting go hand and hand, so there’s a little bit of overlap. This is the most crucial phase for refining gameplay, uncovering hidden flaws, and elevating your design from “interesting” to “great.” Playtesting not only helps you fine-tune mechanics but also gives you a clearer sense of your game’s emotional arc: when players are excited, confused, bored, or surprised.
This phase should be messy. Expect things to break, rules to get rewritten, and mechanics to evolve. That’s not failure, it’s design in action.
Types of Testing and What They’re For
- Internal testing is you and your team playing the game yourselves, early and often, to test rough ideas. It helps identify problems before you bring in outside voices.
- Controlled testing involves playtesting with handpicked players, often game designers, experienced hobbyists, or people in your target demographic. This helps uncover deeper balance and pacing issues and test new mechanics in a low-stakes setting.
- Blind playtesting is the gold standard. Give your game and rulebook to people who’ve never played or seen it before, and observe how they learn and play without assistance. This shows you whether your rules make sense and your UI (icons, components, layout) communicates well on its own.
- Diverse testing is essential. Play with players of different ages, experience levels, and backgrounds. A game that only works for your inner circle might fail in the real world.
Where and How to Playtest
Playtesting is the lifeblood of game development and should happen continuously throughout your prototyping journey.
- In-person playtests: Invite local gamers, friends, family, or game groups to your home, game stores, or conventions. Watching players interact with your game firsthand provides invaluable insights into player behavior, engagement, and confusion points.
- Remote playtests: Use online platforms like Tabletopia or Tabletop Simulator to host the game and use a tool like Discord to host the playtesting session. Remote sessions help gather diverse opinions and test how well your game translates to a digital environment (useful if you plan print-and-play or digital versions).
- Organized events and conventions: Attend local or regional gaming conventions where you can demo your prototype to many different players. This exposes your game to varied demographics and gaming styles.
What to Watch For
- Rules confusion: If players are consistently asking the same questions, it’s a sign your rulebook or iconography needs revision.
- Downtime or boredom: Track how long each turn takes and when attention starts to drift. Great games keep momentum moving without overwhelming players.
- Overpowered/underpowered strategies: If a particular strategy always wins (or never wins), the game needs rebalancing to preserve variety and fairness.
- Player engagement: Pay attention to emotional cues. Are people excited to take their turn? Are they talking about strategies between games? These are signs your game is resonating.
- First-time clarity: Can new players pick it up and play within 10–15 minutes? If not, simplify or clarify.
Keeping Track of Your Testing
Use feedback forms with targeted questions (e.g., “What part of the game felt slow or confusing?” “Did you feel like you had interesting decisions to make each turn?”) and track data across many sessions. Digital platforms like PlaytestKit or Google Forms are helpful for organizing results.
You should also maintain a changelog, a running document where you note tweaks, what prompted them, and how they affected gameplay. This helps you avoid repeating past mistakes and shows how far the game has come.
When Are You “Done” Testing?
You’ll never hit perfect, but you’ll start to notice diminishing returns. When feedback becomes repetitive, gameplay feels consistent, and players can enjoy the full experience without confusion, you’ve likely reached your final iteration.
Then, and only then, are you ready to move on to final production decisions, artwork, and launch planning.
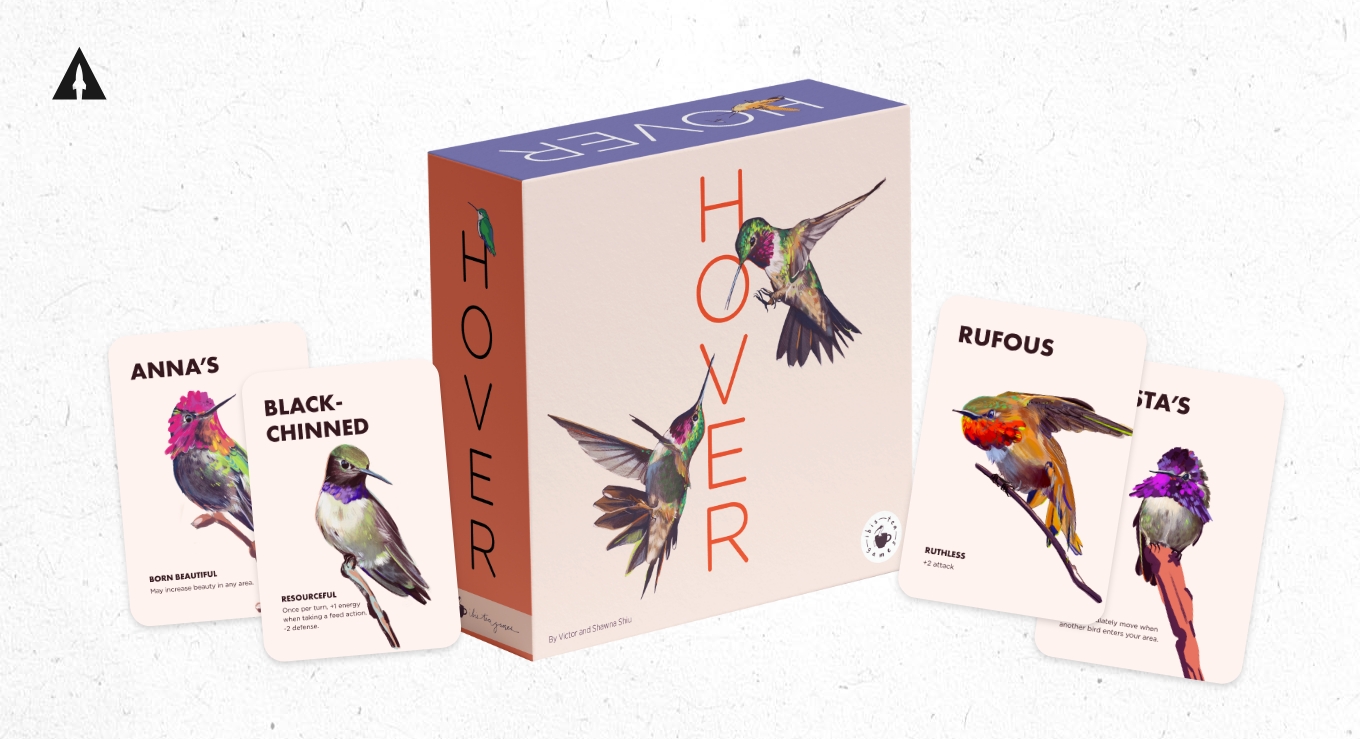
For example, Hover is a game in progress that’s a great example of the playtesting process at work. Victor, the creator, has taken his game to several conventions and to gatherings with friends and family which caused him to change some of the aesthetics and even some core mechanics of his game. Since he stayed in that DIY phase, he’s been able to act quickly and iterate on those changes before going fully to a manufacturer.
Tips for Playtesting
- Prepare clear goals for each playtest session. Whether testing rule clarity, pacing, balance, or a specific mechanic.
- Encourage honest, critical feedback. Let players know they’re helping you improve the game, not trying to “get it right.”
- Observe without interrupting. Sometimes the most valuable feedback is unspoken, confusion, hesitation, or frustration in body language.
- Keep detailed notes on what players say, where they struggle, and how they react to different parts of the game.
- Iterate quickly. Adjust rules or components based on feedback and test again before making major changes permanent.
- Vary player counts during testing to ensure the game scales well across different group sizes.
- Test with your target audience. A strategy-heavy eurogame needs different feedback than a party game, and experienced players may miss things casual players struggle with.
- Repeat sessions with the same groups to test whether fixes improve the experience.
Step 5: Finalize Your Design and Visual Identity
Once your mechanics are refined through testing, it’s time to shift focus from how the game plays to how it looks, feels, and reads. The difference between a functional prototype and a game people are excited to back often comes down to visual presentation. Great art and design aren’t just aesthetic, they impact clarity, usability, and perceived value.
This is where you work with artists, graphic designers, and production specialists to create the visual identity of your game.
The Three Design Pillars
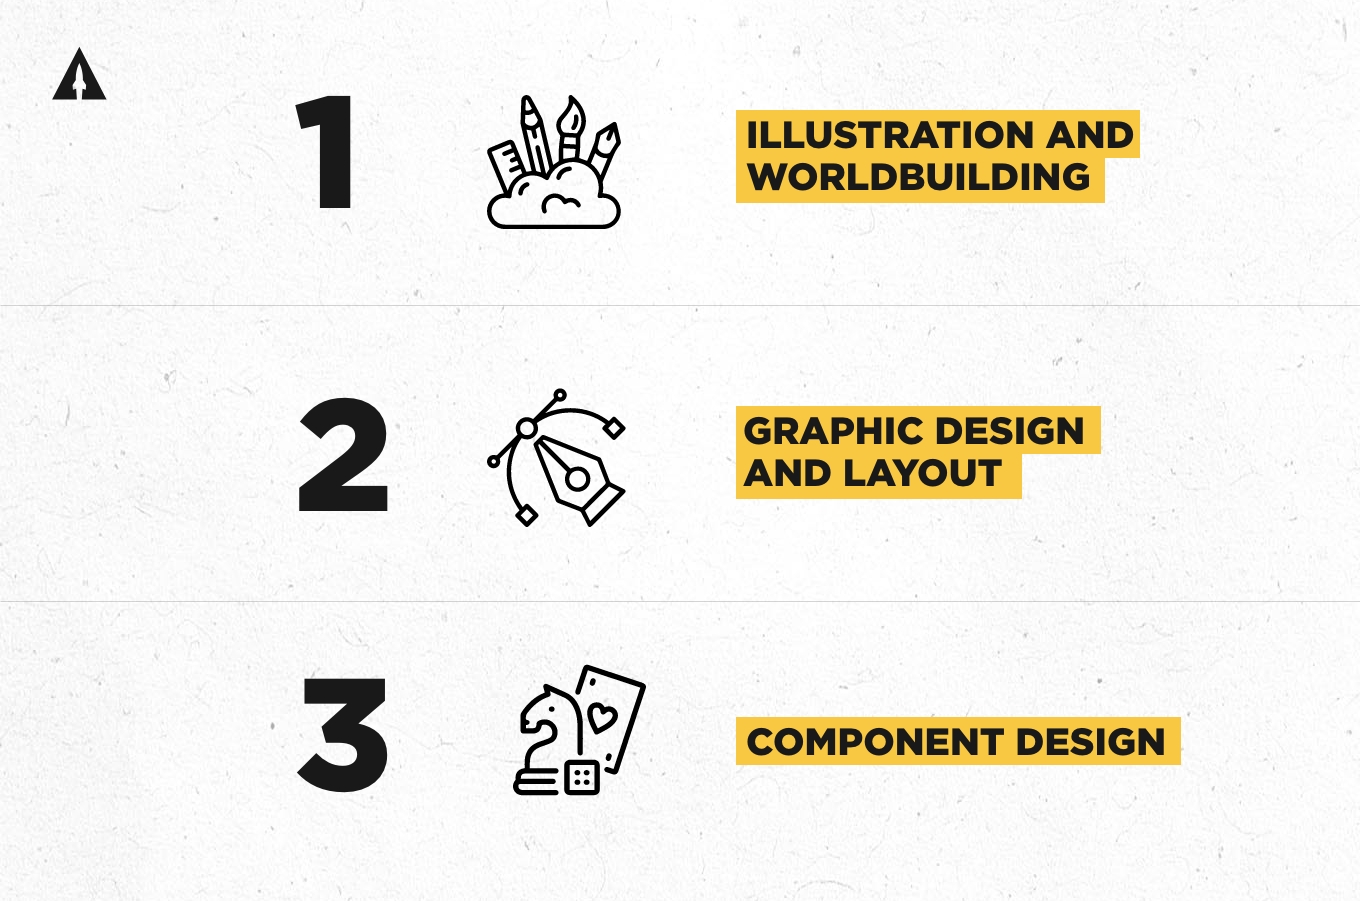
1. Illustration and Worldbuilding
Artwork gives your game personality and emotional appeal. Whether it’s charming dragons, brutal sci-fi landscapes, or cozy woodland creatures, the visual tone you choose will help your audience understand what your game is about before they ever read the rules.
- Hire artists with experience in board games whenever possible,they understand how to balance detail with function.
- Look for consistency. Mixing styles or having unfinished art alongside polished work can break immersion.
- Be mindful of cultural sensitivity and representation. Avoid art that alienates potential players.
2. Graphic Design and Layout
Good graphic design isn’t noticed, it just works. It helps players process information quickly and navigate rules without confusion.
- Icons, resource symbols, and card layouts should be intuitive and legible.
- Test graphic elements with players to ensure they aid rather than hinder usability.
- Use color coding, typographic hierarchy, and spacing to reduce visual overload.
3. Component Design
This includes your game board, cards, player mats, tokens, miniatures, and packaging.
- Think practically. Does a piece need to be cardboard, plastic, or wood? How will it fit in the box? Is setup easy?
- Consider the “table presence” or how your game looks when fully set up. Backers often make decisions based on first impressions.
- Design for durability, especially for components that get handled frequently.
Where to Find Artists, Designers, and Specialists
You don’t need to already know people in the industry to work with great creatives. There are vibrant communities and platforms where talented professionals showcase their portfolios and take commissions.
- Artists and Illustrators
- ArtStation: Great for high-end fantasy/sci-fi artists.
- DeviantArt: Still a huge directory of skilled illustrators.
- Board game Facebook groups (e.g., “Board Game Design Lab Community”) often have artist recommendation threads.
- Reddit (e.g., r/boardgames or r/freelance): Post a call for portfolio submissions.
- Instagram: Use hashtags like #boardgameart or #tabletopillustrator to discover artists actively working in the space.
- Graphic Designers
- Behance: Filter for print designers and UX/UI experts with board game experience.
The Game Crafter’s Designer Directory: Even if you’re not manufacturing with them, they list freelancers. - LinkedIn or design-focused Discord communities (such as Doodle Meeple).
- Behance: Filter for print designers and UX/UI experts with board game experience.
- Component and Packaging Experts
- Ask your manufacturer or production partner for referrals,they often work closely with freelance packaging designers.
- Kickstarter campaign credits: Look at games you admire and see who did the layout, iconography, or packaging.
- Commission Platforms (for any role)
- Upwork: Good for finding long-term collaborators or niche specialists.
- Fiverr: Hit-or-miss, but some illustrators and layout pros here specialize in games.
- Doodle Meeple: Specifically built to connect board game creators with artists, designers, writers, and more.
For Example…
- PARKS, the first edition, succeeded in large part due to its stunning visuals. The game’s beauty helped it stand out immediately.

- Earthborne Rangers worked with a team of artists to create a cohesive world across cards, boards, and manuals,ensuring everything felt part of the same universe.
- Wingspan paired accurate, hand-drawn bird illustrations with clear, minimal card layouts, balancing educational content with elegant design.
Tips For Working on Your Board Game art:
- Start early, but not too early. You don’t want to invest in finalized art until your mechanics are locked in.
- Create a clear brief. Provide artists with your theme, tone, references, and specific requests for each asset.
- Ask to see print ready samples (not just digital art). A piece that looks great on a screen doesn’t always translate well to small card sizes or board components.
- Use contracts. Always outline payment terms, delivery schedules, revisions, and rights ownership.
- Credit your artists. Many backers support campaigns in part because of standout illustrations.Acknowledge that talent publicly!
- Use your art in your marketing. In addition to improving gameplay and immersion, they also generate excitement on social media, campaign pages, and ads.

Step 6: Handle Business and Legal Foundations
Before diving into marketing and crowdfunding, it’s crucial to get your business and legal ducks in a row. Proper preparation here protects your intellectual property, minimizes risks, and sets you up for smooth operations, especially when working with freelancers, manufacturers, and backers.
Board game design is creative, but it’s also a business venture. Without formal structures and legal protections, you risk personal liability, loss of control over your IP, and costly misunderstandings.
Getting these foundations right early makes your campaign and production phases less stressful and more professional.
Key Areas to Address
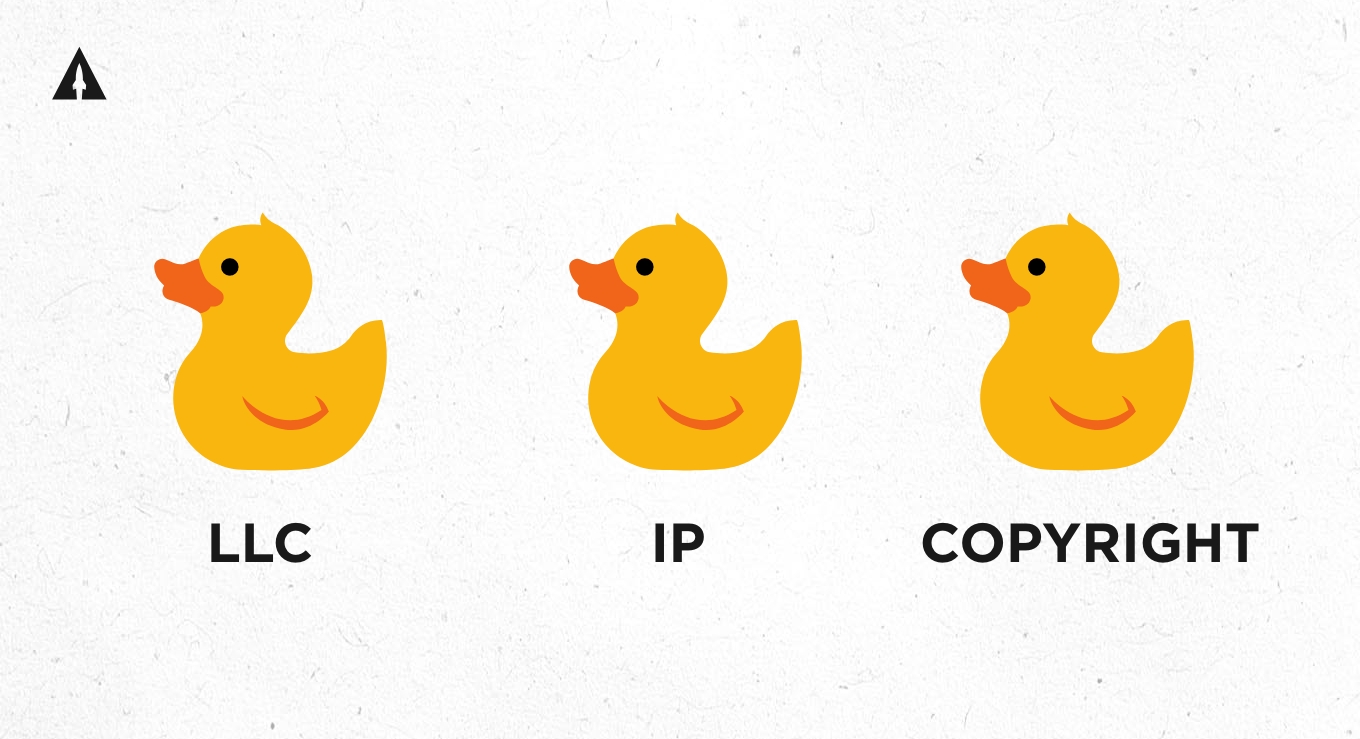
1. Form Your Business Entity
Many creators start as sole proprietors, but forming an LLC (Limited Liability Company) or other legal entity offers critical protections:
- Liability protection: Keeps personal assets safe if the business faces legal issues.
- Professionalism: Partners, backers, and service providers often prefer working with formal companies.
- Tax flexibility: LLCs allow pass-through taxation and can simplify finances.
Formalizing your business helps protect your personal finances and builds trust with collaborators and backers.
Example: The team behind PARKS formed an LLC before launch, giving them peace of mind when contracting artists and manufacturers and negotiating distribution deals.
2. Manage Your Budget and Finances
Create a detailed budget including:
- Manufacturing estimates (factoring in minimum order quantities and shipping)
- Artwork and graphic design fees
- Marketing and advertising spend
- Platform fees (Kickstarter charges 5% plus payment processing fees)
- Contingency funds (unexpected costs often arise)
Having a clear budget prevents costly surprises and ensures you have enough funds to complete your project successfully. To get a clearer picture of all the costs involved, watch our video on How Much It Costs to Make a Board Game.
3. Protect Your Intellectual Property
Your game’s name, logo, art, and mechanics may all be protectable.
- Trademarks: Register your game’s name and logo to prevent others from using them.
- Copyrights: Automatically protect your written materials and art, but consider formal registration for stronger enforcement.
- Trade secrets: Keep key design documents confidential using NDAs when sharing with freelancers or manufacturers.
Securing your IP ensures your unique ideas and brand are protected from being copied or exploited by others.
4. Use Clear Contracts and Agreements
Whenever you work with artists, designers, manufacturers, or consultants:
- Have written contracts detailing payment terms, deliverables, deadlines, and rights ownership.
- Include clauses on revisions, cancellations, and dispute resolution.
- Use Non-Disclosure Agreements (NDAs) to protect confidential information during development.
Clear contracts help avoid misunderstandings, protect your rights, and ensure professional relationships run smoothly.
Avoid relying solely on informal emails or verbal agreements, which can cause confusion or legal trouble down the road.
5. Understand Your Legal Obligations to Backers
Crowdfunding is a form of commerce. You have legal responsibilities to deliver on promises or refund if things go wrong.
- Familiarize yourself with consumer protection laws in your country and internationally if shipping overseas.
- Keep transparent communication during and after your campaign.
- Consult a lawyer if you’re unsure about liability or compliance issues.
Where to Find Help
- Legal advice: For board game-specific legal counsel, consider reputable lawyers like Noah Downs, who has worked with industry giants such as Fantasy Flight Games, Leder Games (creators of Root), and Legends of Avantris, and Zack Strebeck, known for his work with WizKids, Plaid Hat Games, and Stonemaier Games. They specialize in intellectual property, contracts, and crowdfunding law tailored to tabletop projects.
- Accounting: Hiring a CPA or bookkeeper familiar with crowdfunding projects can save headaches at tax time.
- Business mentors: Local small business development centers or board game design communities often have experienced creators willing to share advice.
A Tip for The Business and Legal Side:
If you’re just starting out, you can begin with a sole proprietorship and basic contracts, then upgrade to LLC and full IP protection as your project grows. Don’t let perfectionism delay your progress, just make sure you’re protecting yourself enough to avoid major risks.
Step 7: Build Your Community and Marketing Engine
A strong community and well-planned marketing strategy are the lifeblood of a successful board game launch. Building buzz early and nurturing your audience ensures you have passionate backers ready when your Kickstarter goes live.
Without a dedicated audience, even the best-designed games can struggle to gain traction. Marketing isn’t just about ads, it’s about creating genuine connections, sharing your vision, and building excitement that turns followers into loyal backers and future customers.
Key Components of Your Marketing Engine
1. Start Building Early
Begin connecting with potential players months before your launch.
- Use social media platforms like Instagram, Facebook, Twitter, and TikTok to share your game’s development journey.
- Create a pre-launch landing page where interested people can sign up for updates.
- Join and contribute to relevant tabletop communities on Reddit, BoardGameGeek, and Discord servers.
2. Email Marketing: Your Most Valuable Tool
Collect email addresses via your website or events to build a list of genuinely interested potential backers.
- Use tools like Mailchimp to send regular newsletters.
- Share exclusive updates, sneak peeks, and behind-the-scenes content.
- Offer freebies like wallpapers, print-and-play demos, or access to playtesting surveys to encourage signups.
Email marketing consistently delivers the highest conversion rates for Kickstarter campaigns and helps you maintain direct contact without relying on social media algorithms.
3. Organic Social Media Content
Focus on storytelling and authentic engagement:
- Post progress updates, designer insights, and personal stories.
- Share player testimonials or early playtest reactions.
- Engage followers by responding to comments and questions.
- Use hashtags relevant to board gaming to expand reach.
Consistency and transparency build trust and make your community feel part of the process.
4. Paid Advertising: Targeted and Measured
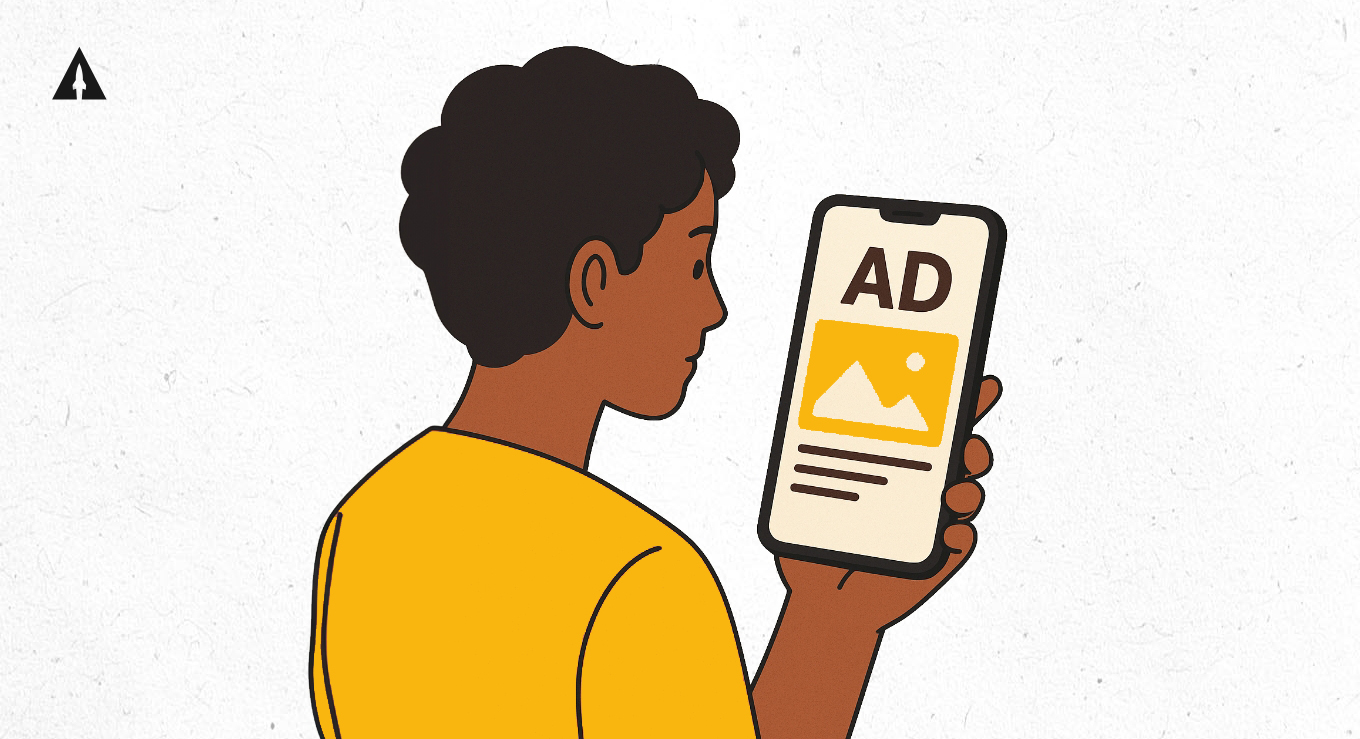
When you’re ready, supplement your organic efforts with paid ads on Facebook, Instagram, and Google.
- Define your target audience carefully, board gamers interested in similar games, Kickstarter backers, hobby communities.
- Start with small budgets and test different creatives and messages.
- Monitor ad performance closely and adjust targeting or creatives based on results.
- Use retargeting to reach people who visited your website or engaged with your posts.
5. Leverage Influencers and Content Creators
Partner with board game reviewers, podcasters, and YouTubers who can showcase your game to their audiences.
- Reach out early with prototypes or previews.
- Offer exclusive interviews, demo sessions, or giveaways.
- Build genuine relationships rather than just transactional promotions.
6. In-Person Marketing: Connect Face to Face
Attending conventions, game stores, and local meetups can be invaluable for building community and spreading word-of-mouth.
- Demo your game at conventions like GenCon, PAX Unplugged, or Essen Spiel.
- Partner with local game stores to host demo nights or launch events.
- Engage with your local tabletop groups or clubs.
7. Create a Marketing Timeline and Budget
Map out your marketing activities from pre-launch through campaign and fulfillment phases.
- Plan content themes and ad schedules.
- Set milestones for community growth and engagement.
- Allocate budget proportionally, prioritizing the channels that perform best.
A Tip for Building Your Marketing Engine:
Treat your pre-launch email list like gold. It’s not just a list, it’s your future backers. Use engaging updates, sneak peeks, and campaign countdowns to keep them warm. A strong list of even 1,000 targeted, engaged fans can outperform 10,000 cold leads. There are crowdfunding marketing agencies like us at LaunchBoom who can help you hone in the right strategies for this step if you aren’t sure where to start.
Step 8: Choose the Right Crowdfunding Platform
After months (or even years) of development, choosing where to launch your crowdfunding campaign is one of the most strategic decisions you’ll make. The platform you select doesn’t just impact how much you raise, it affects who finds your game, how you manage pledges, and how you handle logistics after the campaign ends.
Each of the major platforms: Kickstarter, BackerKit, and Gamefound has its strengths, drawbacks, and best-fit use cases. The right one depends on your goals, audience, and internal capabilities.
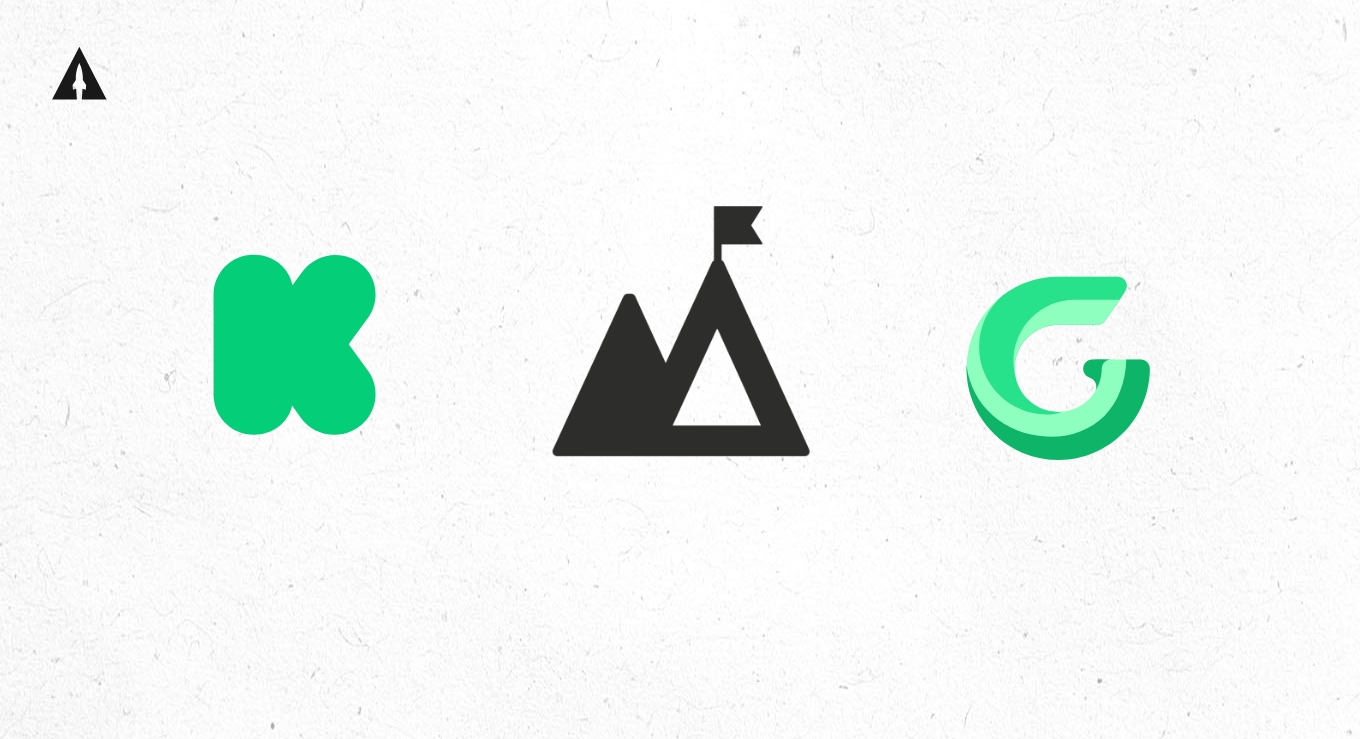
I’ll talk through them here, but if you’re interested in an even deeper dive, you can check out our blog post, Kickstarter vs Gamefound vs Backerkit.
Kickstarter
Kickstarter is still a leader in tabletop crowdfunding. It has the largest audience of backers, the most robust community of board game fans, and the highest organic discovery potential. If you’re aiming to break through to a wide audience, this is likely your best shot.
Why creators choose it:
- Massive, engaged backer base specifically tuned into board games.
- Strong organic discovery, your campaign can get found via trending pages, tags, and staff picks.
- Widely recognized by press, influencers, and YouTube reviewers.
What to watch out for:
- High competition. Thousands of board games launch here annually.
- You’ll need to bring your own audience or risk getting buried.
- Limited native tools. Most creators use third-party platforms like BackerKit post-campaign.
BackerKit
BackerKit originally started as a pledge manager for post-Kickstarter campaigns, but now offers full-featured crowdfunding with its own platform. While its audience is smaller, its tools are among the most advanced and creator-friendly in the space.
Why creators choose it:
- Built-in pledge management, add-ons, and survey tools.
- Streamlined backend for campaign organization, fulfillment, and updates.
- Strong onboarding support and flexible customization.
What to watch out for:
- Smaller organic discovery compared to Kickstarter, you’ll need to bring your audience.
- Some reviewers and press may be less familiar with the platform unless they’re already following your game.
Gamefound
Gamefound is a crowdfunding platform purpose-built for board games and hobby projects. It offers integrated tools like stretch goals, add-ons, and pledge management without needing third-party plugins. While it’s smaller than Kickstarter, it’s growing rapidly and has become the go-to for many mid-to-large publishers.
Why creators choose it:
- Built-in pledge manager, shipping calculator, and stretch goal system.
- Tailored for component-heavy games (e.g., miniatures, modular expansions).
- Great backend for localization, multi-language campaigns, and fulfillment logic.
What to watch out for:
- Still developing its discoverability features, strong marketing is needed to drive traffic.
- Less flexible than Kickstarter when it comes to customizing campaign page layout.
So Which One Should You Choose?
There’s no single “best” option, just the best fit for your game and your goals. Here’s a quick breakdown:
- Choose Kickstarter if:
- You want maximum visibility and access to the largest base of organic backers.
- You’re targeting a general tabletop audience or aiming to get press and media coverage.
- You’re okay using a third-party pledge manager post-campaign.
- Choose BackerKit if:
- You already have a strong following and want seamless tools and creator support.
- You care deeply about managing add-ons, fulfillment, and surveys in one place.
- You want strong back-end logistics and a low-friction pledge process.
- Choose Gamefound if:
- Your game is component-heavy, with lots of SKUs, miniatures, or stretch goals.
- You want an all-in-one platform with built-in tools for managing complex rewards.
- You’re targeting the hobby/core gamer audience and have experience running campaigns.
A Tip for Choosing the Right Platform:
Don’t just pick a platform, study the games that launched there. Look at page layouts, update cadence, stretch goal strategy, and backer interaction. Whether it’s Kickstarter’s social momentum, BackerKit’s post-campaign tools, or Gamefound’s campaign features, align your strengths to the ecosystem that fits your style.
Step 9: Prepare for Production and Manufacturing
At this stage, you’ve built a game people want to play, and a community that wants to buy it. Now it’s time to turn your digital files and prototypes into a physical product that can be manufactured at scale.
This step involves working with a manufacturer, finalizing your specs, managing timelines and budgets, and ensuring quality control. Mistakes here can be costly, so it’s critical to choose partners wisely and stay organized.
Choose the Right Manufacturer
The board game manufacturing world is small, but there are clear leaders who consistently deliver high-quality products on budget and on time.
Trusted Manufacturers:
- LongPack Games (China): One of the most popular options for Kickstarter games. Known for strong communication and handling a wide variety of components.
- Panda Game Manufacturing (China): Highly experienced, especially with deluxe games. Offers design feedback and full-service packaging solutions. Used by titles like Wingspan and Flamecraft.
- Whatz Games (China): Competitive pricing, good for medium-scale publishers, and trusted by creators scaling up after a first campaign.
What to Look For:
- Strong, clear communication and a responsive sales team.
- A track record with other crowdfunded titles.
- Willingness to send pre-production samples (PPCs) and white box proofs.
- Clear quoting, including options for stretch goals, inserts, and packaging upgrades.
Finalize Your Game Specs
Before production begins, you need to lock in your specifications. This includes:
- Component list: Cards, boards, tokens, player mats, rulebooks, inserts, boxes, etc.
- Sizing: Confirm final sizes for cards (e.g., 63×88mm), tokens, boxes.
- Materials: Choose between paper, chipboard, wood, plastic, etc.
- Finishes: Linen texture, UV spot gloss, foil stamping, embossing, all impact cost and appeal.
- Packaging design: Make sure your box art, dielines, and rules are final and proofed.
Understand Minimum Order Quantities (MOQs) and Costs
Most manufacturers require a minimum order quantity of 500–1,500 units. The more units you produce, the lower your cost per unit, but the higher your upfront cost and storage burden.
- For example, a game that costs $12 per unit at 1,000 copies may cost $6.50 per unit at 5,000.
- Add 10–15% buffer inventory for damaged/lost items and customer service replacements.
Read our post on how much it costs to make a board game for a full breakdown of budgeting, freight, fulfillment, and margin planning.
Plan for Timeline and Communication
Game production is a multi-month process. Here’s what a typical timeline looks like once files are submitted:
- Digital proofing (1-2 weeks): PDF proofs of every component.
- Pre-production samples (2-3 weeks): Physical samples of final materials.
- Mass production (6-10 weeks): Your full print run is manufactured.
- Freight and fulfillment (4-12 weeks): Games are shipped to distribution hubs.
Maintain Quality Control
Even great manufacturers can make mistakes. It’s your job to catch them early.
- Review digital and physical proofs carefully.
- Ask for updates and production photos.
- If possible, work with a quality control partner in China (many creators use freelancers for this).
Don’t sign off on mass production until you’ve held a final sample in hand and checked it against your spec sheet.
Tips For Navigating Manufacturing
- Prioritize components that enhance gameplay. Overdesigning your game with too many custom components can balloon costs and increase delays.
- Always request samples of similar components before committing. And ask other creators about their experience, many are happy to share privately.
- Use a “bill of materials” (BOM) to keep everything organized. Your manufacturer will use this to quote pricing and timelines.
- Build in padding for delays, Lunar New Year, port congestion, and material shortages can add weeks.
- Use project management tools like Trello or Notion to track dependencies, deadlines, and approvals.
- Don’t finalize files too early before playtesting and rules are fully locked.
- Don’t assume shipping and customs are “later problems.” Your box size, component weight, and finishes all impact freight costs.
- Don’t ignore VAT, import duties, or labeling requirements, especially if selling in the EU or UK.
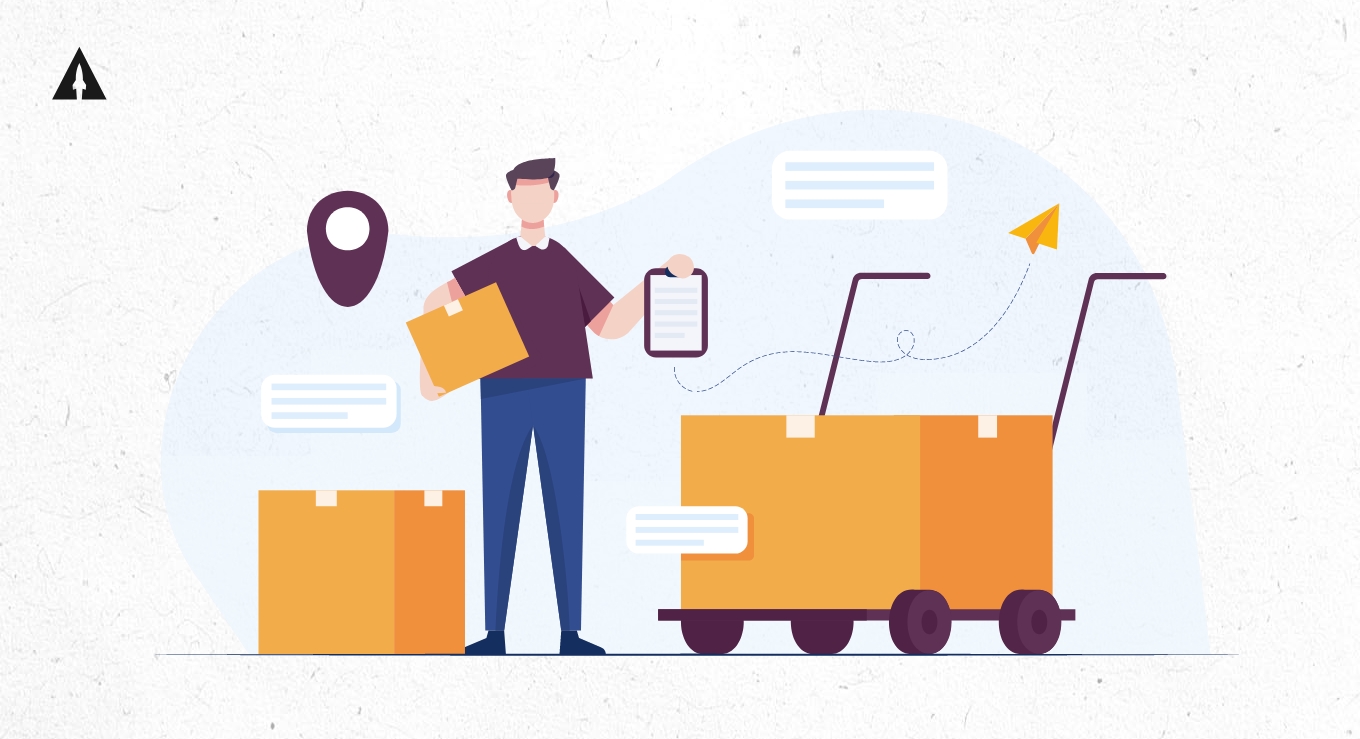
Step 10: Deliver and Fulfill Smoothly
You’ve designed a great game, run a successful campaign, and sent your files to the manufacturer. But one of the most stressful, and overlooked, parts of the journey still lies ahead: fulfillment.
Fulfillment is the process of getting your games from the factory into your backers’ hands. It involves freight, warehousing, customs, taxes, packaging, and customer service. If something goes wrong here, it can erase your profit margin, or worse, damage your reputation.
This step is all about setting clear expectations, choosing the right partners, and communicating proactively with your community.
Break Fulfillment Into Two Stages
1. Freight Shipping (a.k.a. “Getting Games Out of the Factory”)
This is the process of transporting your manufactured games from China (or wherever your factory is) to various fulfillment hubs around the world.
- Ocean freight is the most common. It’s slower (4-8 weeks) but far more affordable than air.
- You’ll need a freight forwarding partner to handle pickup, customs paperwork, and delivery to your regional warehouses.
Examples of freight partners:
- ShipQuest: Offers bundled freight + fulfillment for many creators, especially in the UK and EU.
- Floship: Known for global logistics with good customer support and dashboard tools.
- Easyship: Integrates with platforms like BackerKit and offers customs/VAT management.
Typical Freight Shipping Costs to Budget For:
- Container shipping (LCL or FCL): based on volume (CBM), destination, and market conditions.
- Port fees and drayage: charges for container unloading and transport to warehouse.
- Customs brokerage: professional fees to file your import paperwork.
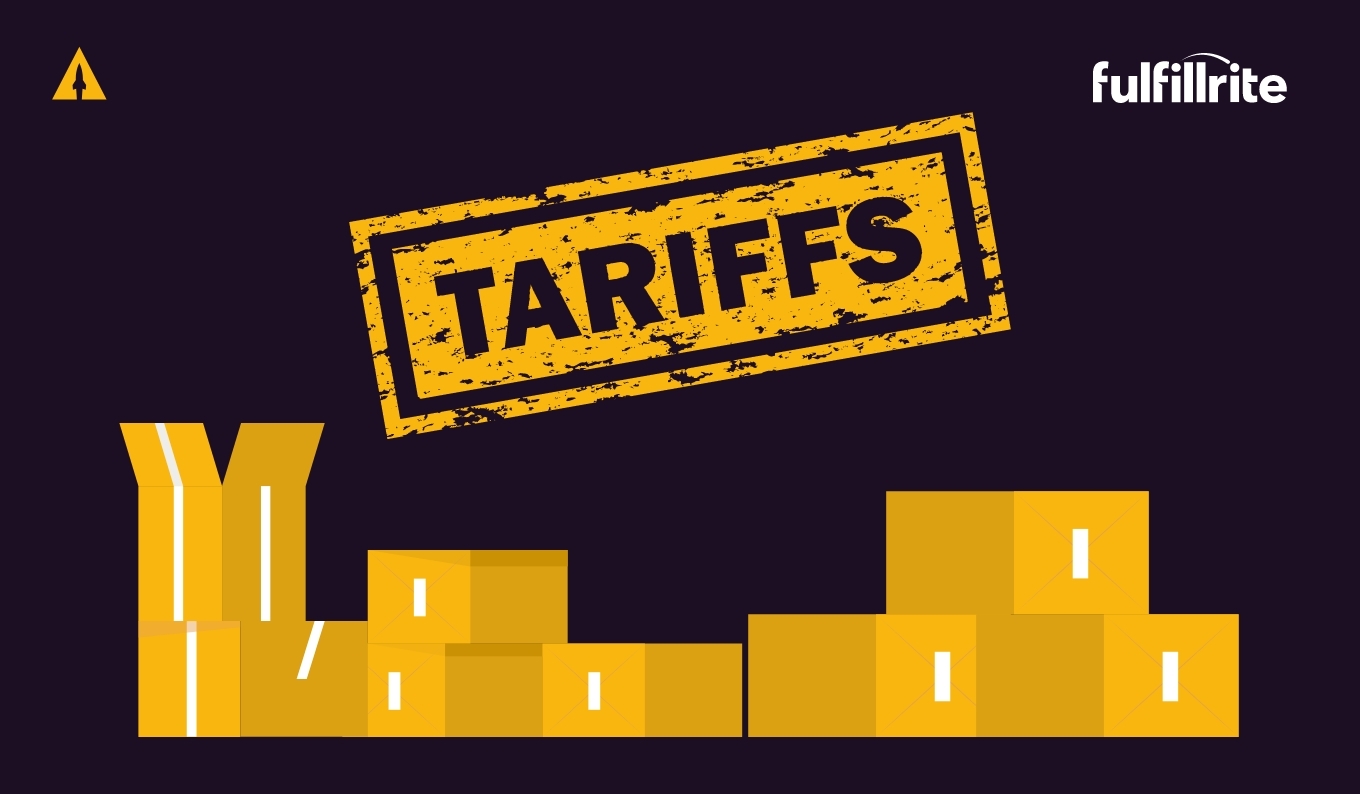
- Import duties, taxes, tariffs: based on declared value and destination rules.
- Freight insurance: coverage for damage or loss in transit.
These costs can fluctuate. Budget conservatively and monitor freight rates leading up to your campaign.
2. Final Fulfillment (a.k.a. “Getting Games to Backers”)
Once your games arrive in regional hubs, fulfillment centers handle last-mile shipping, packing, labeling, and sending orders to backers.
Example fulfillment companies:
- Quartermaster Logistics (US): Trusted by Stonemaier Games, Cephalofair, and other major publishers. Great at handling complex reward tiers and large campaigns.
- GamesQuest (UK/EU): Used by major Kickstarter creators. Offers bundled service with EU-friendly VAT solutions.
- Fulfillrite (US): Especially good for campaigns under 5,000 units. Fast turnaround, great integration.
Fulfillment & Last-Mile Costs to Budget For:
- Receiving fees: the cost to intake, count, and store your inventory.
- Pick-and-pack fees: usually charged per backer package or per item.
- Packaging materials: mailers, tape, inserts, etc.
- Domestic/international postage: varies widely by region and package weight.
- VAT/Tax compliance: IOSS or UK VAT numbers for EU/UK shipments.
- Returns & customer service buffer: to replace lost or damaged items.
Understand VAT, Duties, and Labeling
Backers expect you to handle the legal stuff. Here’s what you need to know:
- EU & UK require VAT to be prepaid for packages under a certain threshold (typically €150/£135). Use a fulfillment partner who can handle this with IOSS (EU) and UK VAT systems.
- Labeling laws differ by country. For example, some require country of origin, CE marks, or choking hazard warnings.
- Customs declarations must be accurate,mislabeling your game as “gift” or underreporting value can lead to delays or fines.
Tips for Shipping Smoothy
- Don’t underestimate shipping costs. Rates fluctuate. Budget 10-15% of your funds for shipping and then add a buffer.
- Collect shipping fees separately. Avoid locking in unrealistic rates pre-campaign.
- Don’t skip quality checks before freight. A botched print job is 10x harder to fix after your games are on the water.
- Create a dedicated support email with autoresponder FAQs on shipping.
- Track issues in a shared spreadsheet or CRM.
- Add buffers to your timeline. Tell backers fulfillment may begin 2–3 months after production ends, not immediately after.
- Explain freight delays. Tell them how ocean freight and port slowdowns affect your timeline.
- Communicate transparently. Share photos of freight shipments, warehouse prep, and sample packages to maintain trust.
- Plan for customer service. Issues will arise like lost or damaged goods and backers wanting to update addresses.
Step 11: Run a Post-Mortem and Plan What’s Next
Once the dust settles and the last game has shipped, it’s tempting to take a break (and you should!). But before moving on, it’s critical to run a post-mortem, an honest evaluation of how your project performed from start to finish.

This isn’t just about celebrating wins or venting frustrations. A strong post-mortem helps you improve future projects, strengthen your team, and build a long-term business around your games.
Whether you plan to launch expansions, start a new game, or grow into a publisher, this is the moment where momentum turns into mastery.
What to Include in Your Post-Mortem
1. What went well
Take stock of the wins: big and small. Did your campaign surpass its goal? Did your community respond well to a particular mechanic, theme, or ad channel? Capture those moments so you can replicate them later.
2. What didn’t
Be honest with yourself and your collaborators. What caused stress, delays, or unnecessary costs? Where did you overbuild, underbudget, or miscommunicate?
3. Marketing & conversion data
Look at your analytics: Which emails got the highest click-through? What was your ad ROI by platform? Where did most of your pledges come from? Use this data to inform your next campaign strategy.
4. Budget vs. actual
Compare what you planned to spend vs. what you actually spent on manufacturing, freight, fulfillment, advertising, art, etc. This is where creators often learn hard lessons about margins and unexpected costs.
5. Team feedback
If you worked with freelancers, agencies, or collaborators, ask them what could have gone better. Keep it constructive and forward-looking.
How to Conduct It
- Write it down. This isn’t just a conversation, document your findings. A simple shared Google Doc can serve as a powerful internal reference.
- Share with your community (strategically). You don’t need to post every misstep, but backers appreciate transparency. Some creators even post full writeups or lessons learned on BoardGameGeek or their blog.
- Use your data. Pull numbers from Kickstarter/BackerKit, ad platforms, email providers, and your own financial records. Don’t rely on memory alone.
- Schedule it. Do this within 30–60 days after fulfillment ends while it’s still fresh.
Examples
Botany is a great example of this data gathering at work. Since their original campaign, they’ve given webinars and live talks where they spoke transparently about their numbers, how ad spend worked for them, and answered questions about what they’d do differently next time. They also kept up with their Kickstarter shipping updates. They’ve been running multiple successful campaigns since, showing that backers really appreciate that transparent communication
Set the Stage for What’s Next
This is also your chance to look forward:
- Are you developing an expansion, sequel, or new IP?
- Will you reprint or distribute to retail?
- Are there conventions you should attend to grow your visibility?
- Do you want to turn this into a publishing label?
Use the momentum you’ve built: email list, press contacts, social followers, ad data and start sketching the roadmap for your next move.
Tips for Running Your Post Mortem
- Make time for this part of the process. The more effort you put into this review, the smoother your next project will be.
- Send a post-fulfillment email asking backers for feedback to stay subscribed for future launches. Include a teaser or “behind the scenes” preview to keep them excited.
- Pause before blaming external factors without reflection. Shipping delays happen, but what could you control next time?
- Prioritize it shortly after your campaign. Details get fuzzy. Run your post-mortem while everything’s still clear.
You’ve Got the Blueprint, Now Build It
Designing a board game isn’t just about creating mechanics or artwork, it’s about bringing a vision to life in a way that connects with real people. From spark-of-inspiration to boxes on backers’ shelves, each step you take shapes not just the product, but the community that grows around it.
Whether you’re in the early stages of concepting or deep in freight logistics, remember: you’re building something that didn’t exist before and that’s no small feat.
And if you found this guide helpful, be sure to check out our video version where we break it all down visually and share even more examples from successful campaigns.
If you’re ready to get started on bringing your game to life, you can chat with one of our experts today.
Now, go make something people will love to play.
Frequently Asked Questions
How long does it take to design a board game?
Timelines vary widely, but most successful creators spend 12 to 24 months from concept to Kickstarter launch. That includes several months for playtesting, visual design, and marketing. The more you test and refine, the smoother your campaign and fulfillment will be.
How much does it cost to make a board game?
Expect a total cost between $25,000 and $100,000 to bring a board game to market. That includes manufacturing, shipping, marketing, and professional artwork. For a full breakdown, check out our blog post, “How Much Does it Cost to Publish a Board Game” where we share real numbers from each category.
Do I need to trademark or copyright my game?
Yes, protecting your intellectual property is smart once your concept solidifies. Copyright covers written rules and artwork automatically, but consider filing trademarks for your game’s name or logo. Board game lawyers like Noah Downs (who’s worked with Legends of Avantris) and Zack Strebeck (who’s worked with Stonemaier Games) specialize in this space.
Where can I find artists or designers for my game?
Great creatives are easier to find than ever. Explore ArtStation, Doodle Meeple, or Behance, and look at the credits of campaigns you admire. Many talented artists and graphic designers actively take commissions within the board game community.
Should I launch on Kickstarter, BackerKit, or Gamefound?
It depends on your audience and goals. Kickstarter offers the biggest reach and built-in trust. BackerKit provides integrated pledge management and marketing tools, making it ideal for creators who want streamlined fulfillment. Gamefound is best for hobby-focused games that benefit from community discoverability within the tabletop niche.
How do I get people to playtest my game?
Start with friends and family, then branch out to local game stores, conventions, or online groups like r/boardgameDesign. You can also send prototypes to content creators for early reviews. Remember to test with both casual and experienced players to balance accessibility and depth.
What are the biggest mistakes first-time creators make?
The most common pitfalls are rushing to Kickstarter too early, underestimating shipping and tariffs, and neglecting marketing until the last minute. Treat your campaign like a business launch, not just a creative project. Build your audience months before you go live.
Do I need a big audience before launching?
Not necessarily, but you do need an engaged one. A list of 1,000 genuine followers who know and trust your project is better than 10,000 cold leads. Focus on email capture, consistent social media updates, and behind-the-scenes content to grow a real community.
What’s the best way to handle shipping and fulfillment?
Plan for it early. Use reputable partners like Fulfillrite, Easyship, Quartermaster Logistics, or Floship. Factor in every line item—container shipping, freight forwarding, last-mile delivery, tariffs, and taxes—before setting your Kickstarter goal.
What should I do after my campaign ends?
Run a full post-mortem. Document what worked, what didn’t, and how you can improve next time. Send updates to your backers, keep your community active, and start planning your next launch while your game fulfills. Every successful creator learns and levels up from their first campaign.