Every year, tens of thousands of creators launch products that no one want.
On Kickstarter alone, 59.9% of all the projects that have launched have failed. That means 341,879 projects have failed with an average of 26,298 / year since Kickstarter started. That doesn’t count all the other platforms people launch on either.
But what if you could know if your product was going to be successful before you launched it?
It’d be like having a crystal ball to see into the future. Surely you would want to know how to do this. It would save you enormous amounts of time, money, and effort.
Unfortunately, many creators think their product idea is validated when it’s not. Here are some common ways I’ve heard creators “validate” their product:
- They compare their product to a product that’s already successful
- They get feedback from friends and family who say the product is great
- They collect surveys from people who claim they would buy their product
None of these examples are inherently bad data to collect, but they aren’t sufficient to validate your product idea.
Good news is, I have a process we’ve used to validate hundreds of products. And by using it, you can launch with confidence.
Launch with confidence by validating your product before you launch.
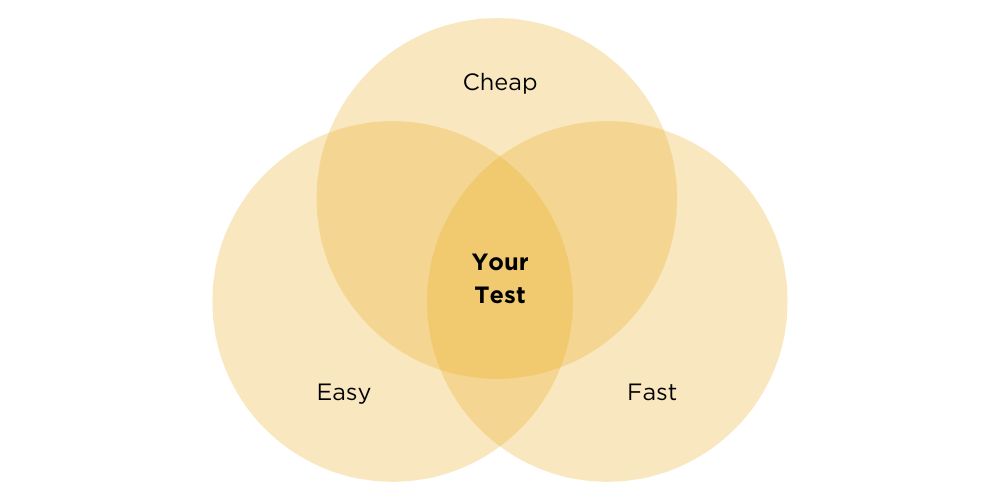
To validate your product, you are going to be designing an experiment. The goal of the experiment is to test whether or not people want your product with the least amount of time, money, and effort. This means we want your experiment to be cheap to set up, easy to execute, and fast to finish.
Here’s how you set up your experiment in 5 steps:
Step 1: Design your lean experiment
7 years ago, I read a book called The Lean Startup by Eric Ries. It changed the way I thought about business. I learned that the most successful companies are constantly testing assumptions through experimentation.
Here’s the framework for “lean” experimentation:
Step 1.1: State your hypothesis
A hypothesis is a clear statement that can be proven true or false.
In this case, your hypothesis will be something like: I believe that the market wants to buy my product and I should launch it.
Step 1.2: Identify the key metric:
A key metric is a metric that will allow you to prove or disprove your hypothesis.
The best way to know if your product is validated or not is if you can acquire customers profitably. Because of this, the key metric I recommend is called Expected Return on Ad Spend or eROAS for short. This metric will take other data from your experiment and predict what your return on ad spend will be on your product.
For this experiment, if you have a eROAS of 2x or greater, your product will be validated.
Step 1.3: Create your plan
Your plan is how you will collect data to prove or disprove your hypothesis.
The “plan” will consist of the following and will be covered in steps 2-5:
- Create your minimum viable product (MVP)
- Build a Reservation Funnel
- Drive traffic using Facebook ads
- Analyze your data using a predictive model
Let’s dive in.
Step 2: Create your minimum viable product (MVP)
The term MVP is defined as:
A version of a new product which allows you to collect the maximum amount of validated learning about customers with the least effort.
This is the step where most product creators make a huge mistake – falsely believing that they must create a physical prototype in order to have an MVP. But you DO NOT need to have a physical prototype to have an MVP.
Instead, use photorealistic renderings at this stage. Here’s the best way to get photorealistic renderings created:
- Sketch: Sketch your idea on a piece of paper and take a photo of it
- Reference images: Create a Google Drive and fill it with images of different products that you want to emulate
- Find a render artist: go to Upwork and search “photorealistic render artist”
- Get renderings: ask for a combination of lifestyle and white background images
Below is a real example of a sketch we drew at LaunchBoom to show how this process works. On the right you can see the final output.

You can get professional photorealistic renderings created for under $1,000. On top of that, you will NOT have to pay thousands of dollars for:
- Product design
- Prototype creation
- Photography
⚠️But wait… do photorealistic renderings really work in marketing?
Yes, they do. We not only validated a hotel concept called Nomad’s Pad using only renderings, but also launched the campaign and drove $582,505 in presale revenue.
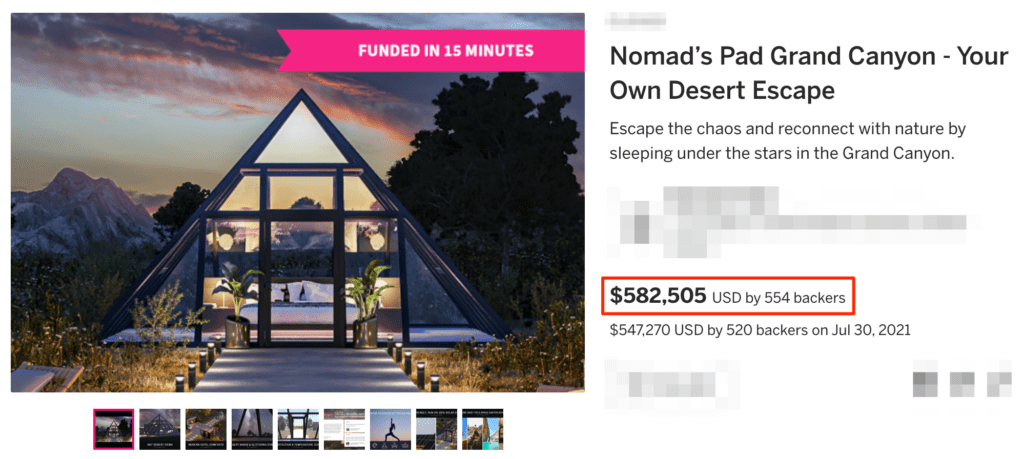
By using photorealistic renderings at this stage, you will easily save thousands of dollars and potentially months of time.
Step 3: Build a Reservation Funnel
The Reservation Funnel is how you are going to collect data. Here’s what it looks like from a high level:
- Landing page
- Reservation bridge
- Reservation checkout
Next, I’ll breakdown each step:
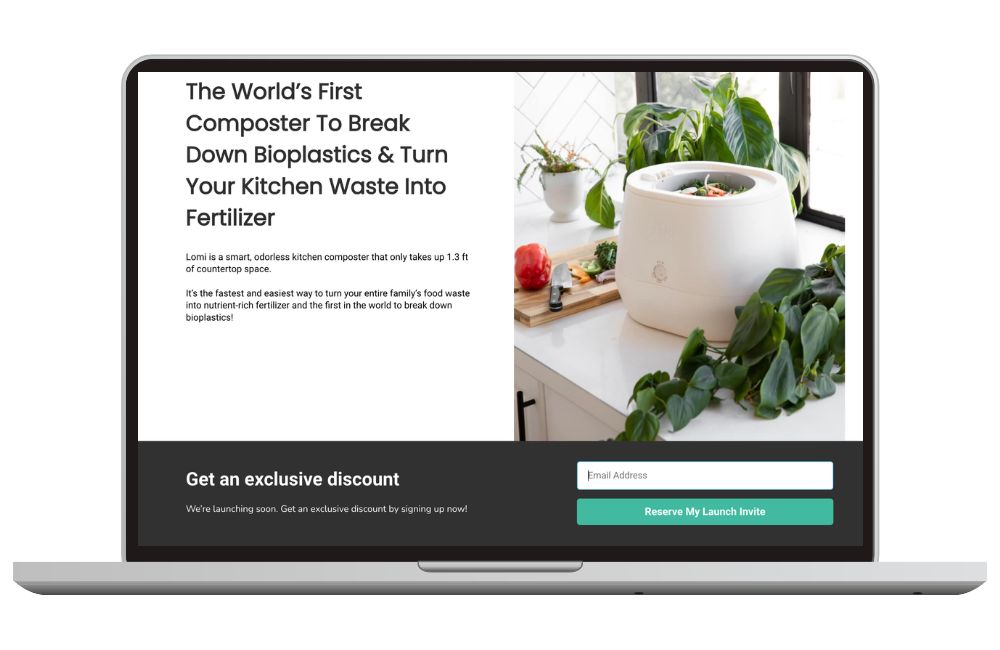
Reservation Funnel Step 1: Landing page
The landing page is the main place where you’ll be “selling” your new product idea. Your goal is to get someone to enter their email address to be notified when you launch.
Reservation Funnel Step 2: Reservation Bridge
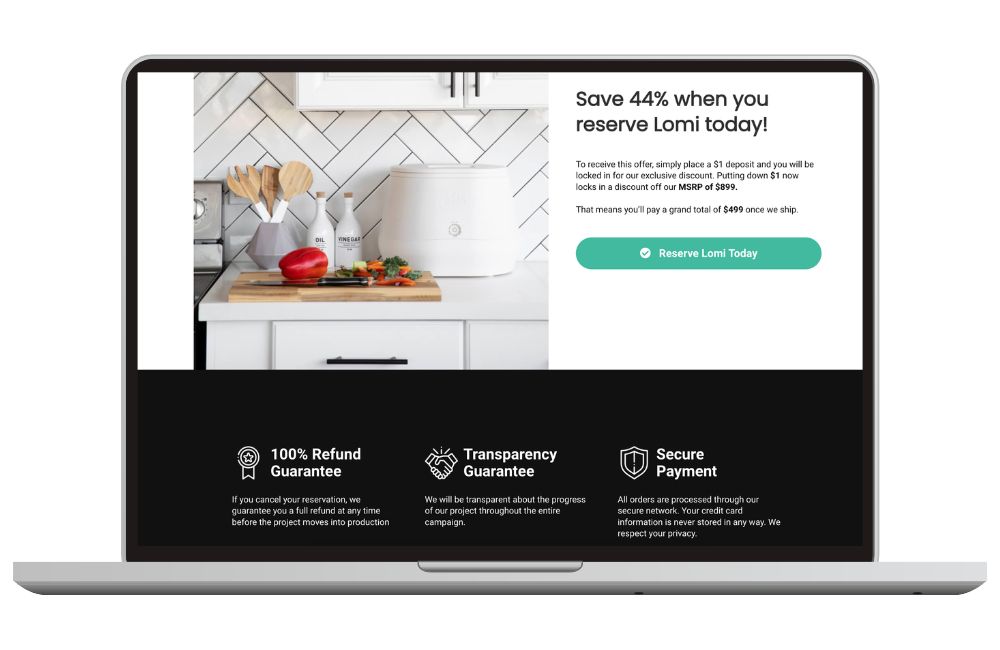
Once someone has opted-in to your email list, they’ll be taken to the Reservation Bridge. This is where you tell them that they can “reserve” the best discount by putting down a $1 deposit. Your goal is to get someone to click to go to checkout.
Reservation Funnel Step 3: Reservation Checkout
Once they click the button, they’ll be taken to a checkout page to complete their $1 deposit. Your goal is to get someone to pay for the $1 deposit.
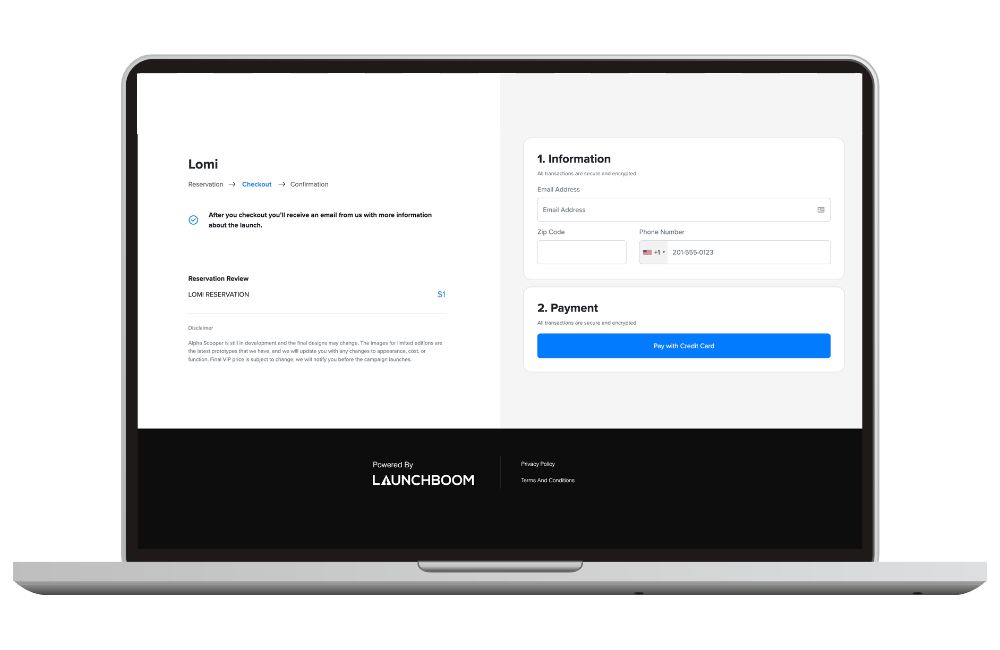
🤔But how do I create my reservation funnel?
Great question! I recommend you use the following tools:
Step 4: Drive traffic using Facebook ads
For driving leads, Facebook & Instagram are still by far the best channels. That’s why I recommend you use Facebook to drive traffic to your Reservation Funnel.
Here’s what I recommend you set up for your test:
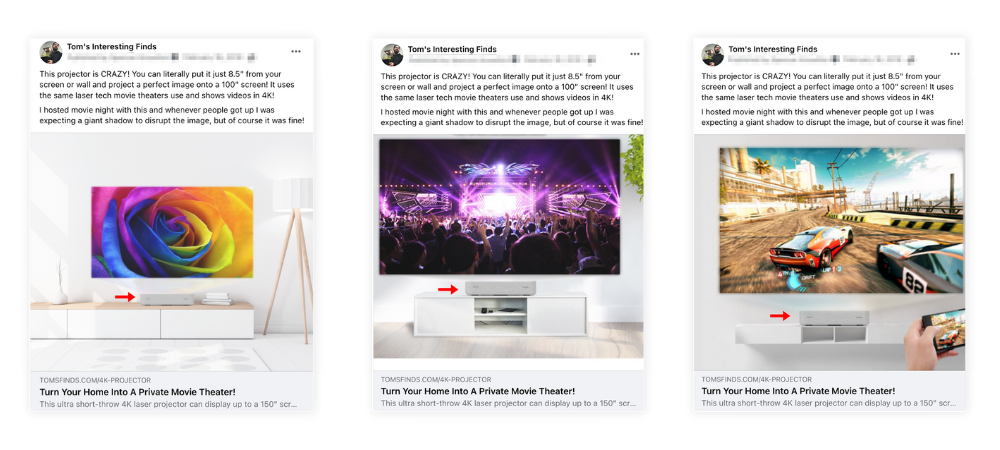
Ad creative
I would test 3 different pieces of ad creative. Focus on testing imagery like you see in the example below:
Audiences
I would target 2-3 audiences for this stage too. A great way to brainstorm audiences is to use the 4 F’s Framework:
- Who do they follow?
- Where do they frequent?
- What do they do for fun?
- What do they fund?
Ad spend
I would recommend spending at least $2,000 in ad spend on your test. If you spend any less, it’s highly unlikely you’ll have enough data to validate your hypothesis.
Step 5: Analyze your data using a predictive model
Now that you’ve collected all your data, it’s time to put it into a predictive model to see what your final key metric is! Remember, you’ll be using eROAS (expected return on ad spend) as your key metric to prove or disprove your hypothesis.
Below you’ll find a link to a calculator you can use. In the calculator, you are going to input the following:
- Your total ad spend
- How many emails you collected
- How many reservations you collected
- What price point you made your reservation deposit ($1 is most common)
- What your launch price will be
- Expected conversion rate for leads
- Expected conversion rate for reservations
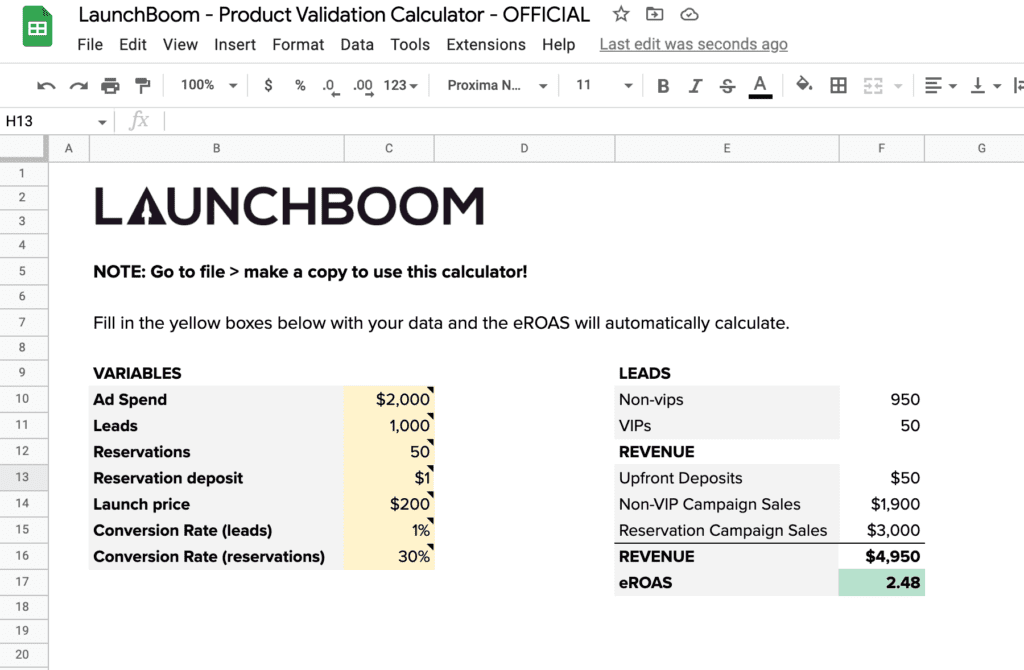
Click here to use the calculator and calculate your eROAS.
In the example above, we were over a 2x eROAS so we have proven our hypothesis!
TL;DR
Using this system, you will be able to quickly, cheaply, and easily validate whether or not you should launch your product. All you have to do is follow these 5 steps:
- Design your lean experiment
- Build your MVP with photorealistic renderings
- Build your Reservation Funnel
- Drive traffic with Facebook Ads
- Analyze your data using a predictive model
Get out there and start validating!

